Guest Notification Filter Configuration
Introduction
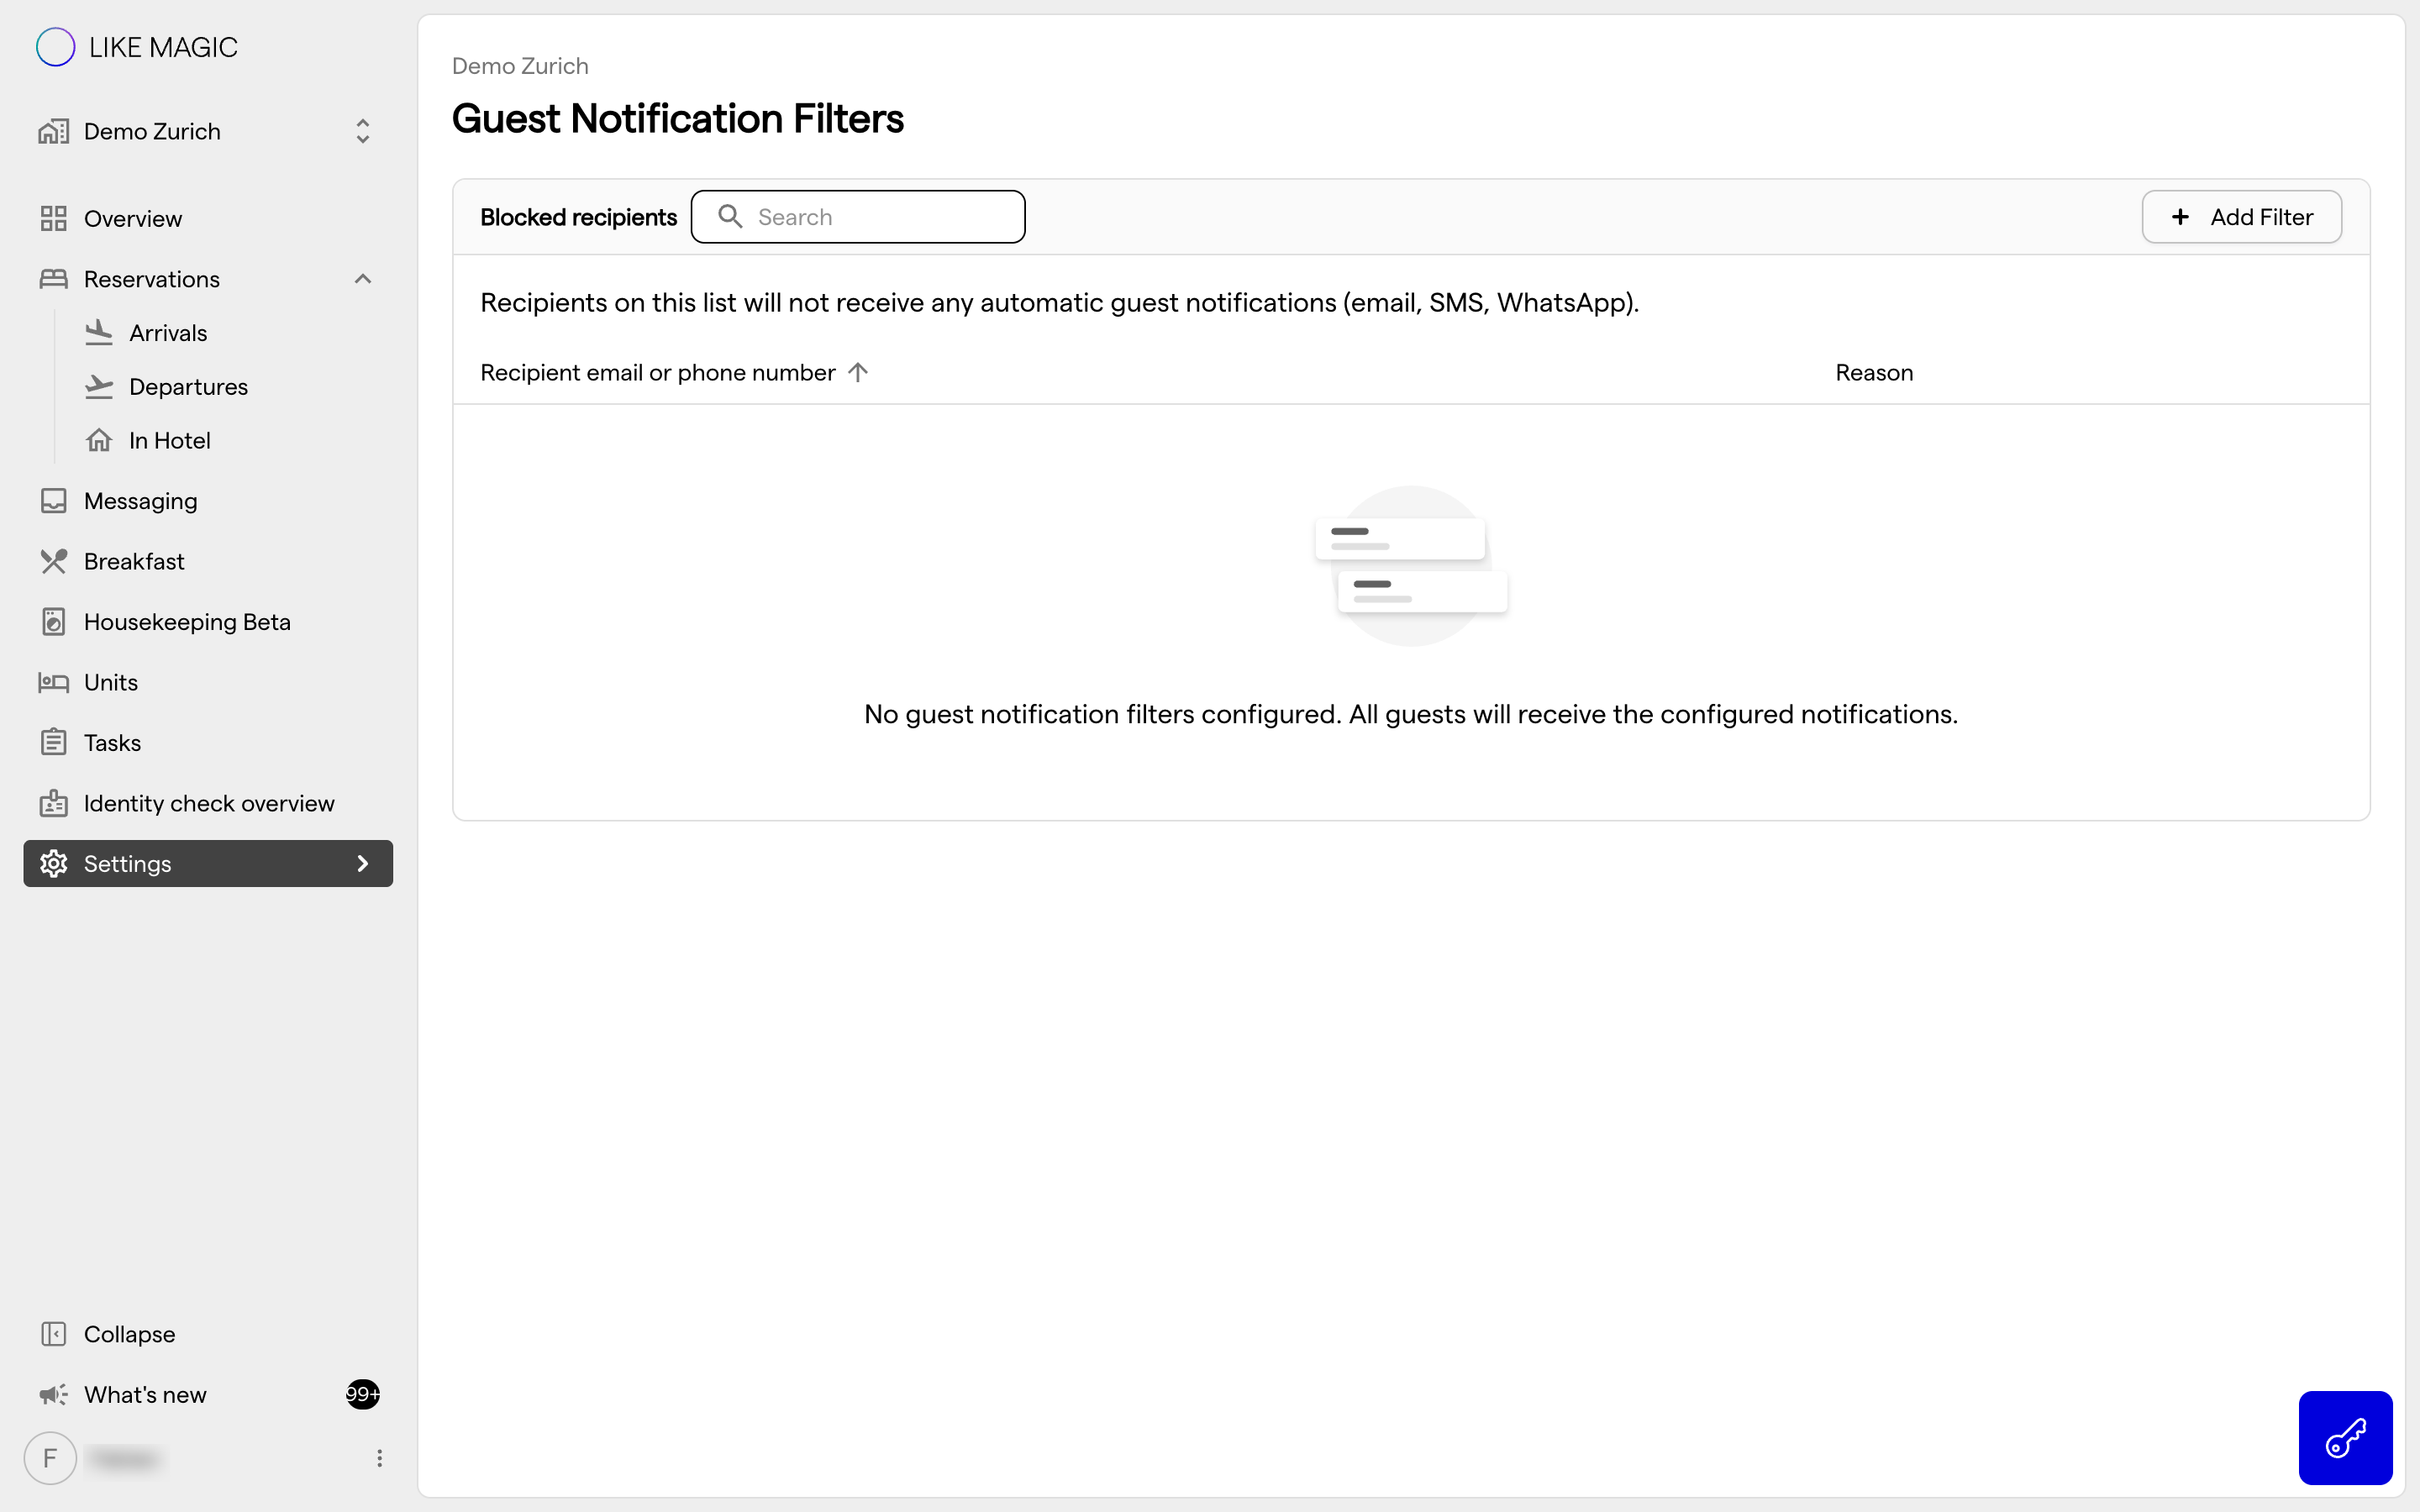
The Guest Notification Filters page in the LIKE MAGIC Operations Platform lets an Account Administrator stop guest notifications from being sent to specific addresses, across all Properties within an Account.
From a single configuration page, you can maintain the list of blocked recipients: add an entry with a reason, edit it and remove it again. Changes take effect immediately, with no publishing step.
This is the way to suppress notifications for test addresses, opt-out requests or internal system addresses, without touching individual notification templates or flows.
1. Who Can Use This Feature?
Access depends on the role assigned to your user account:
| Role | Access Level |
|---|---|
account-admin (Account Administrator) | Full access, can view, add, edit and remove recipients |
account-viewer (Account Viewer) | Read-only, can view the list but cannot change it |
| All other roles | The page is not shown in the sidebar |
Note: If you can see the page but cannot add or remove entries, your account has the
account-viewerrole. Request the additional permissions via a Support Ticket.
2. How to Navigate to the Page
- Log in to the Operations Platform at
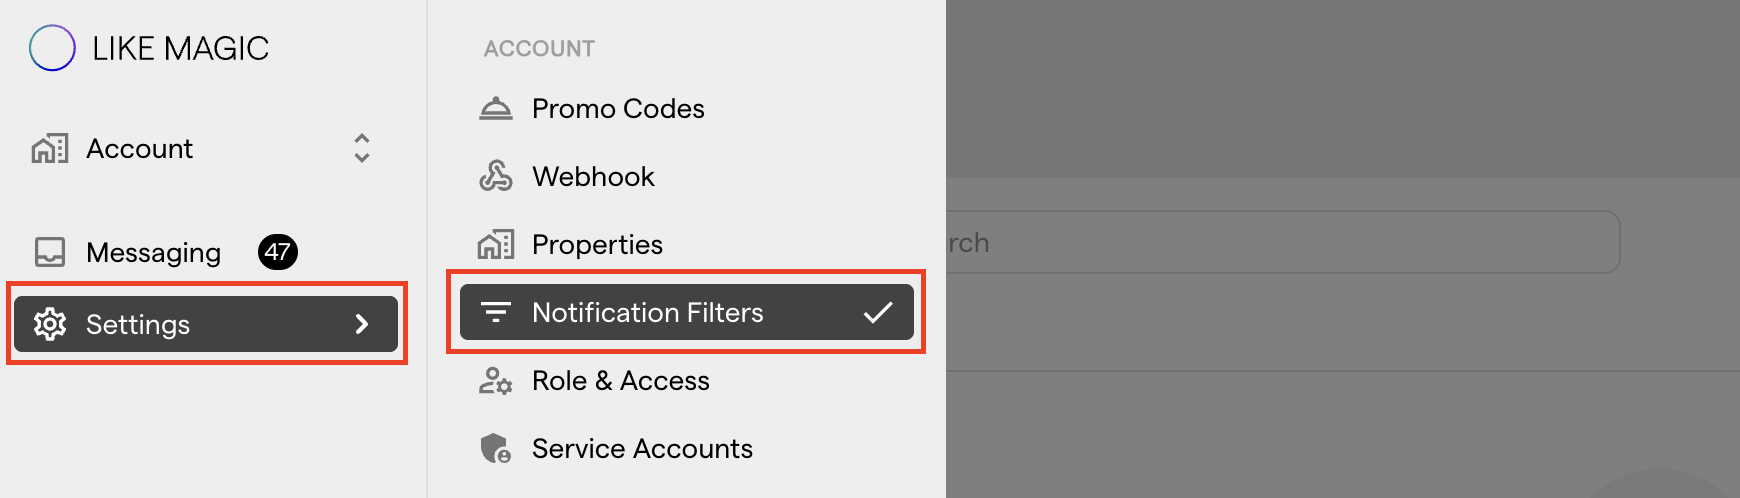
https://backoffice.<your-account-domain> - Open Settings in the sidebar.
- In the Account section, open Guest Notification Filters.
3. Key Concepts
a) Recipient Blocklist
On the page, the list is called Blocked Recipients. It holds the addresses (email or phone number) that are blocked from receiving guest notifications. Each entry has two fields:
- Recipient Email or Phone Number (
sendTo): the email address or phone number to block. - Reason: a short note on why this address is blocked (for example "Test address" or "Opt-out request"). It is for internal use and never shown to guests.
Each address can only appear once per Account. Duplicate entries are prevented automatically, and the check ignores upper and lower case as well as spaces.
b) Account-Level Scope
The Recipient Blocklist is configured at the Account level and shared across all Properties within your Account. There is no per-Property override. If an address is on the blocklist, it will be blocked regardless of which Property sends the notification.
c) Notification Channels Covered
The filter applies to all outgoing guest notification channels:
- SMS
4. Managing the Blocklist
In the Blocked Recipients section you see every blocked recipient and manage the entries. Use the search field above the list to find an address, and the actions menu at the end of a row to edit or delete it.
Adding a Recipient
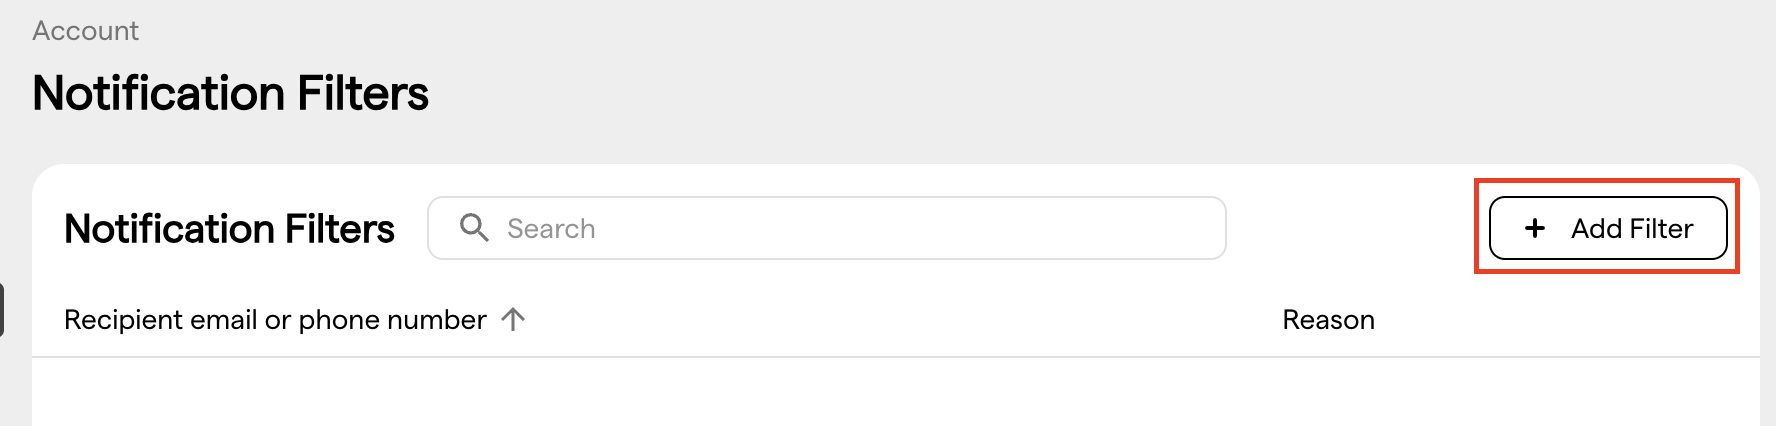
- Click Add Filter above the list.
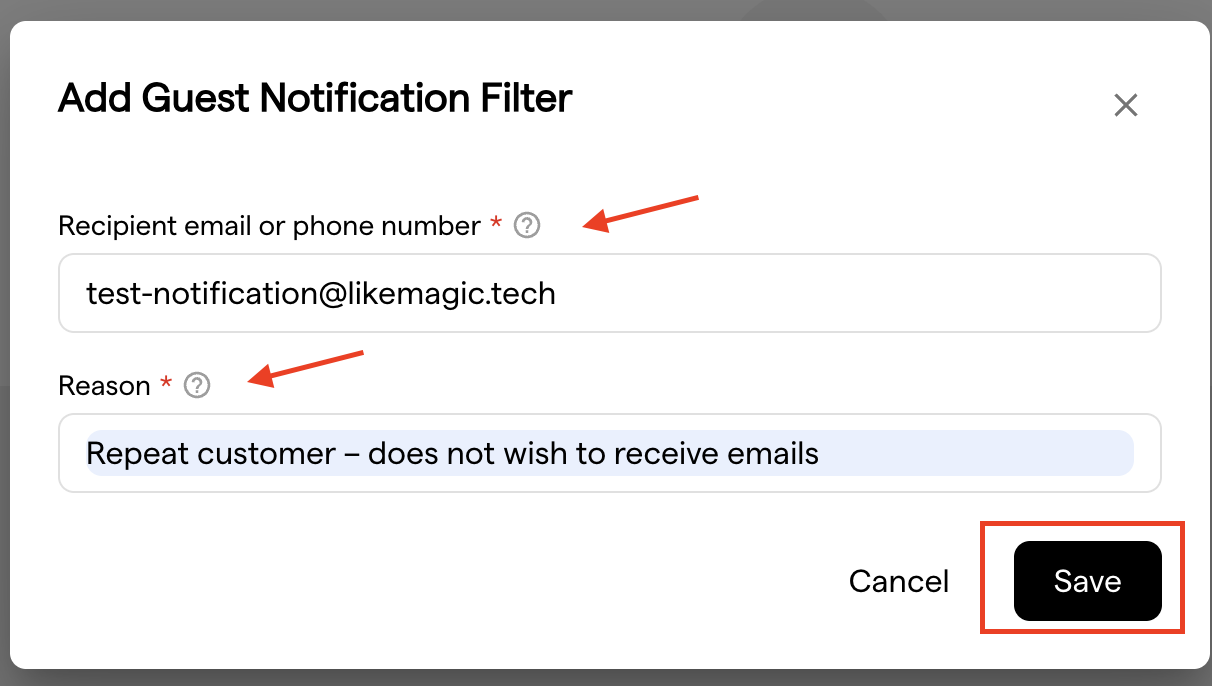
- Fill in both fields:
- Recipient Email or Phone Number: the email address or phone number to block.
- Reason: a short note on why this address is being blocked.
- Click Save.
The entry is added immediately and the address no longer receives any guest notifications.
Note: Both fields are required, the value must be a valid email address or phone number, and each address must be unique within the Account. If the address already exists (regardless of casing or spaces), the duplicate is refused.
Removing a Recipient
- Find the recipient you want to unblock in the list.
- Open the actions menu at the end of the row and choose Delete.
- Confirm in the Delete Guest Notification Filter dialog.
The entry is removed as soon as you confirm. That address receives notifications again from that point forward.
Remember: There is no undo. To block the address again, add it as a new entry.
5. How the Filter Works
Every time a guest notification is about to be sent, the system checks the destination address against the Recipient Blocklist before dispatching it. If a match is found, the notification is suppressed.
Key behaviors:
- Case-insensitive matching:
Test@Example.comandtest@example.comare treated as the same address. Spaces anywhere in the address are ignored as well. - All channels are covered: the filter applies to Email, SMS and WhatsApp notifications. For Email, only the primary recipient (
sendTo) is checked. Addresses in CC, BCC or multiple-recipient fields are not filtered and may still receive the notification. - Account-wide scope: the blocklist applies to all Properties in the Account; there is no per-Property override.
- Audit trail: blocked notifications generate an error event that is recorded for auditing purposes.
- Immediate effect: changes take effect as soon as they are saved. No publishing or sync step is required.
6. Example Use Cases
- Test addresses: Block addresses used during onboarding or QA that should no longer receive live guest messages once setup is complete.
- Opt-out requests: Suppress notifications for guests or contacts who have explicitly asked to be removed from communications.
- Internal or system addresses: Prevent automated messages from reaching addresses used during integrations or platform configuration.
7. Conclusion
The guest notification filter gives you direct control over which addresses receive automated guest messages. Review your blocked addresses periodically so that test, opt-out, and system entries stay current.