Prismic (Article)
Here you will find instructions on how to create an article for the Digital Guest Portal in Prismic.
Introduction
An article appears in your guest's portal. You can create an article for public transport, restaurant recommendations or the WiFi password, for example, to provide your guests with useful information.
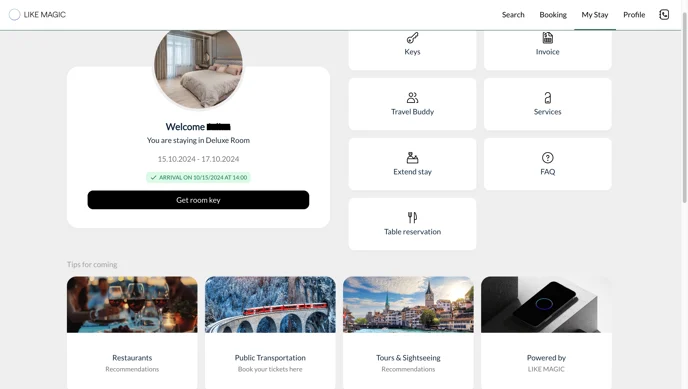
1. Setup
This is how you proceed:
- Log in to your Prismic account: Go to the Prismic website and log in with your access data.
- Filter via “Type - Article”: After you have logged in, you can apply the “Type - Article” filter. This will display all articles that have already been created.
- Customize articles or create new articles:
-
Edit existing articles: If you want to make changes to an existing article, simply click on the desired article. You can edit the content there.
-
Create a new article: If you want to create a new article, click on the “Create New” button and select “Article”. You can then create a new article from scratch.
Use the existing articles as a guide if you want to create new articles or make adjustments.
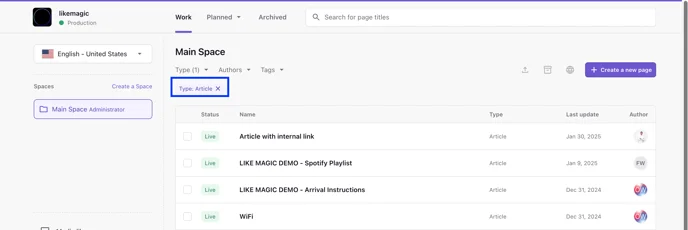
2. Article Structure
An article consists of three main sectors:
- Main: The main sector contains the most important information of the article. This is where you enter the title of the article, the main description and all central content. The Main sector is the first area that readers see and is therefore particularly important for communicating the core message of the article clearly and comprehensibly.
- Card: The Card sector is used to display a preview of the article. Here you can add a short summary of the article that will appear in the article under the title. This area ensures that the article looks good in an overview and encourages people to click on it.
- Details: The Details sector contains detailed information that appears in the article. Here you can insert in-depth descriptions, lists, images or further links. This area provides readers with more in-depth information and helps to expand on the topic of the article.
Each of these sectors helps to make the article structured and clear so that readers can get both a quick overview and detailed information.
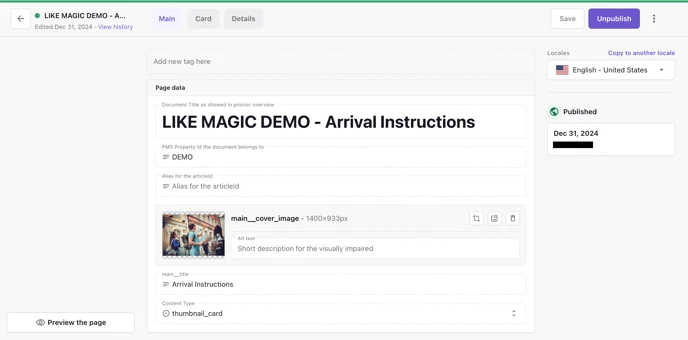
a) Main
- Document Title (as displayed in Prismic): Under “Document Title” you can name your article so that you can find it later in Prismic. This title is only used for internal identification and is not displayed anywhere else.
- Enter PMS ID: You must enter the PMS ID here so that the article appears correctly on your platform. Without this ID, the article will not be displayed.
- Image: In the image field, you can upload any photo or icon that you want to appear in portal for your article. Click on the middle icon to upload an image or icon. Make sure that the image is the right size and format to be displayed optimally.

Under Main_title you can give your article a name. This title will be displayed in the Digital Guest Portal.
Under Content Type, you can select how the image or icon should be displayed in your Guest Portal.
Make sure that you select the correct content type so that the image is displayed in the desired form and visually supports the article.

thumbnail_card:
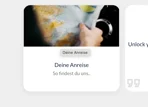
avatar_card:

icon_card: With Icon you have to change the image to an icon so that it is displayed correctly.

b) Card
The Card sector contains the text that appears below the title. Here you can enter a short summary or preview of the article to encourage the reader to find out more. The text in the card section should be concise and engaging, as it is the first information the reader will see when viewing the article on your Digital Guest Portal.
This area is important to pique the reader's interest and encourage them to open the full article.
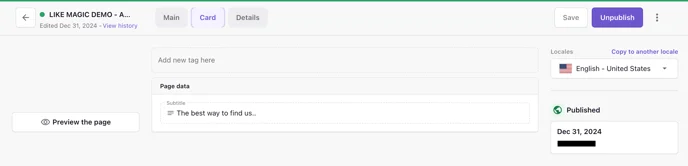
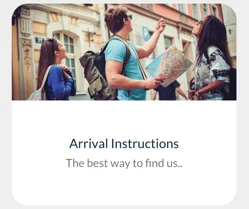
c) Details
In the Details section, you can add all the information you want to appear in the article. Here you have the option of writing the main content of the article, e.g. detailed descriptions, instructions, additional information or further links.
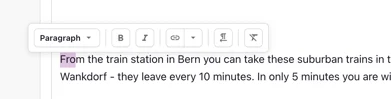
When you highlight the text, you can make various text formatting changes, such as
- Adjust the font (bold, italic, underlined, etc.)
- Insert links to lead the reader to external pages or further content
This section is the most detailed part of the article, providing the reader with the detailed information they need. Make sure to present the text in a clear and well-structured way so that it is easy to understand.
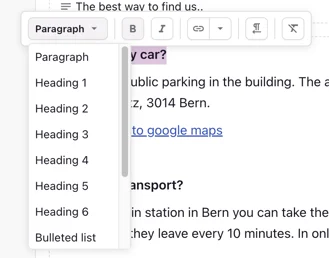
With a / (slash) you can easily add further content such as images, links, titles and numbering in the details sector of Prismic.
If you type a / in the text area, a menu opens with various options that you can insert into your article.
This feature makes it easy to make the article interactive and visually appealing without having to leave the text area.
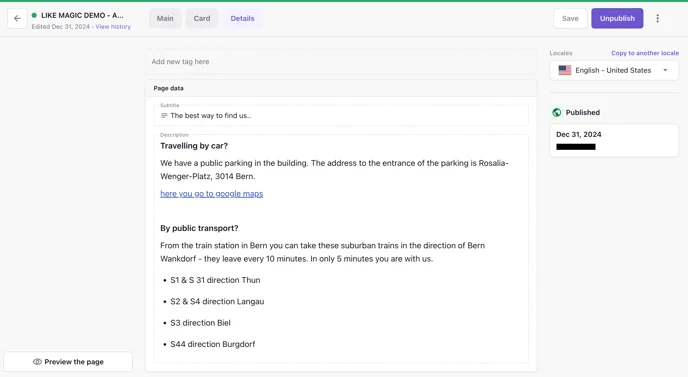
After creating and editing your article in Prismic, don't forget to click on “Save” and “Publish” so that all changes are saved and published.
Also customize the article in all relevant languages if your Guest Platform supports multiple languages. The article only appears in the Digital Guest Portal once all of these steps are done.
Articles in the Guest Portal are centrally managed via the Article Ordering.
3. Controlling Article Visibility (Filters)
By default, a published article appears for every guest of your property. With the PMS ID field and the document tags in Prismic you can filter who sees an article or link in the Digital Guest Portal. You add tags in the tag field of the Prismic document; each tag below must be written exactly as shown.
a) Filter by Property
The PMS ID field in the Main sector ties the article to one property:
- PMS ID set: the article appears only for guests of that property.
- PMS ID empty: the article appears for all properties of your account.
ℹ️ An article can reference only one property. If the same content should appear at several (but not all) properties, create one article per property.
b) Filter by Guest Login
Two tags control visibility based on whether the guest is logged in to their Guest User Account:
AUTH: the article is shown only when guest login is enabled for your property. It is never shown to Travel Buddies. See Travel Buddy.UNAUTHENTICATED: the article is shown only to guests who are not logged in.
c) Show an Article Only via Direct Link
DIRECT_LINK_ONLY: the article never appears in the portal's article list. Guests can open it only through its direct URL, for example from a notification or a QR code. Use this for content you want to distribute selectively.
d) Filter by Booked Service
SERVICE: combine this tag with one or more service codes (each as its own tag). The article is shown only to guests whose reservation includes at least one of the tagged services: for example care instructions that only guests with a spa booking should see.
e) Filter by Unit Group
UNIT_GROUP: combine this tag with one or more Unit Group IDs (each as its own tag). The article is shown only to guests whose reservation is in one of the tagged Unit Groups: for example an operating guide that only applies to suites.
⚠️ Service codes and Unit Group IDs must match the exact values from your PMS. A typo silently hides the article for everyone it was meant for.
f) Filter by Guest Segment
-
SEGMENT: combine this tag with one or more segment codes (each as its own tag). The article is shown only to guests whose reservation carries one of the tagged segments: for example a long-stay information article that only long-stay guests see. The codes are the ones from the segment rules of your property, see Guest Segmentation. -
EXCLUDED_SEGMENT: combine this tag with one or more segment codes (each as its own tag). The article is hidden from guests whose reservation carries one of the tagged segments and shown to everyone else: for example a welcome article you do not want returning guests to see again.
ℹ️ A segment-filtered article needs a reservation to match against, so it never appears in Info Stay, where no reservation and therefore no segment is known.
⚠️ Never put SEGMENT and EXCLUDED_SEGMENT on the same article. The tags are one flat list, so nothing says which code belongs to which of the two. An article carrying both is hidden from everyone.
⚠️ Use one filter tag per article. SERVICE, UNIT_GROUP and SEGMENT are not combined: if an article carries more than one of them, SERVICE decides, then UNIT_GROUP, and SEGMENT applies only when neither of the other two is on the article. An article tagged SERVICE and SEGMENT is therefore filtered by the service alone, not by both. EXCLUDED_SEGMENT is the exception. It is checked first and hides the article whatever the other tags say.
ℹ️ These filters also apply when your articles are curated via Article Ordering. The ordering decides which articles appear in which order, and the filters above are applied on top.
4. Conclusion
An article is built from three sectors. Main carries the title, the PMS ID and the image, Card carries the preview text below the title, and Details carries the full content of the article.
Enter the PMS ID correctly and publish your content in all relevant languages. Without the PMS ID the article is not displayed, and an untranslated language version stays empty.