Prismic (E-Mails)
Here you will find explanations of how email templates are structured in Prismic and how to edit them.
Introduction
All emails can be customised in Prismic so that they match the requirements of your hotel. Here, we explain how the messages are structured and how to edit them in Prismic.
1. Finding E-Mail templates in Prismic
You can filter emails in Prismic under Type: Email. Once you apply this filter, all emails sent in the automated Guest Messaging Flow will appear. Here you will find all email templates used for automated communication, such as booking confirmations, reminders, or cancellation notifications.
From here, you can select and customise each template.
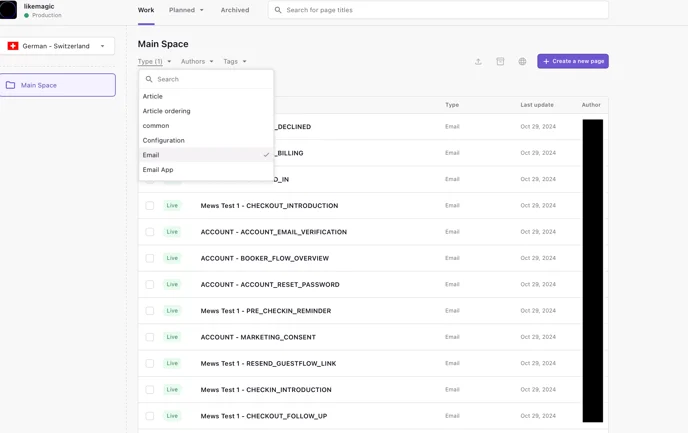
Click on the email you would like to edit. Once you click on the desired email template, the editor will open, allowing you to customise the content and design of the email. Here you can edit text and images to tailor the email to the specific needs of your hotel.

Once you click on the desired email, you will be taken to the following view:
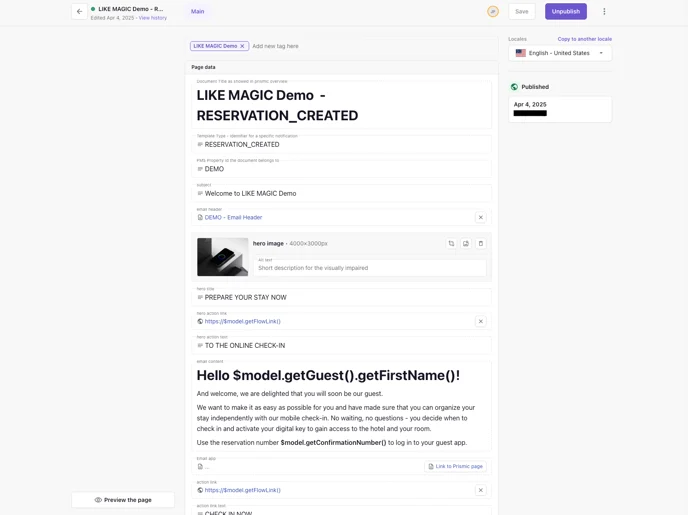
The first three fields, which should remain constant and are more technical in nature, are:
- "Document Title as showed in prismic overview": Title of the template (internal name)
- "Template Type - Identifier for a specific notification": Title of the template (technical)
- "PMS Property ID the document belongs to": The Property-ID (technical)
2. Editing E-Mail Templates in Prismic
a) Subject
- "subject": The subject of the email is inserted here.
Avoid email spam filters: Avoid using all capital letters (CAPS) and unnecessary exclamation marks in the subject line of your email. Spam filters often classify such "shouting" subject lines as dubious and may sort your message out. Formulate your subject line clearly and objectively so that your email reaches the recipient safely.
b) Header
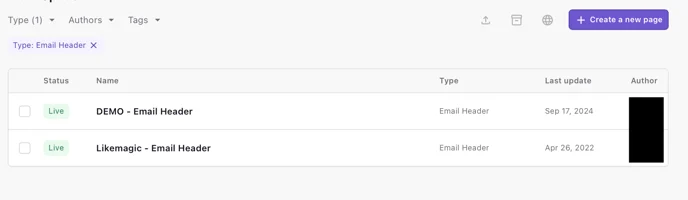
Under "Email Header", you can add the header of your emails.
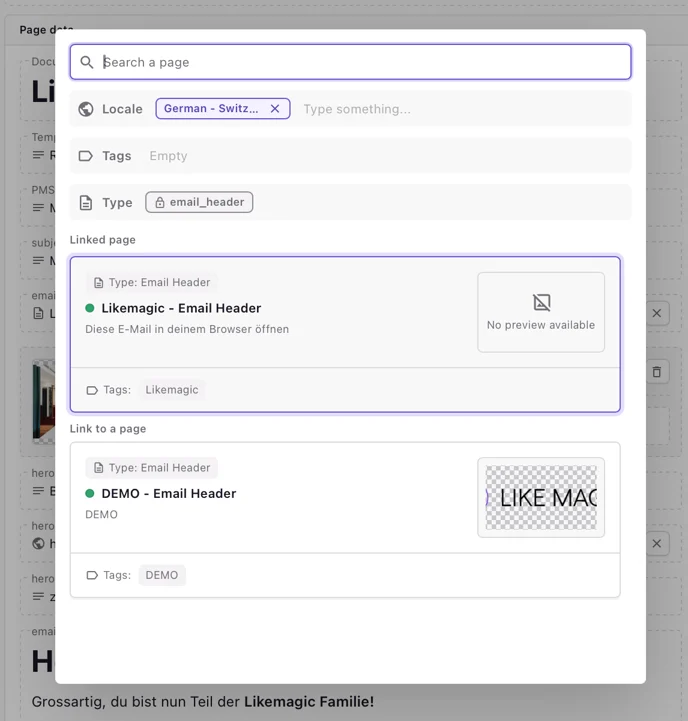
If you want to add a new header, you can return to the Prismic overview page and create a new header under "Create New". However, it is often easier to customise an existing header. Simply click on the existing header to edit it and make the desired changes. This saves you time and means you don't have to create everything from scratch.
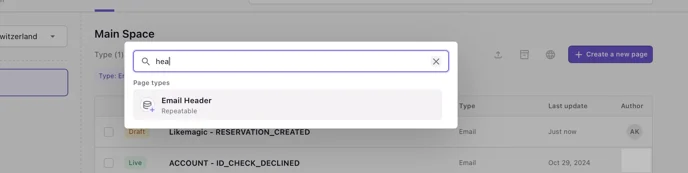
Don't forget to copy the changes into the other languages and insert the correct header into your email so that everything is displayed consistently and correctly in all language versions.
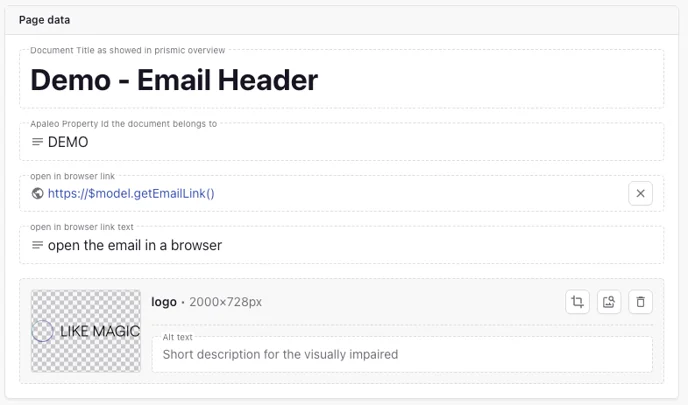
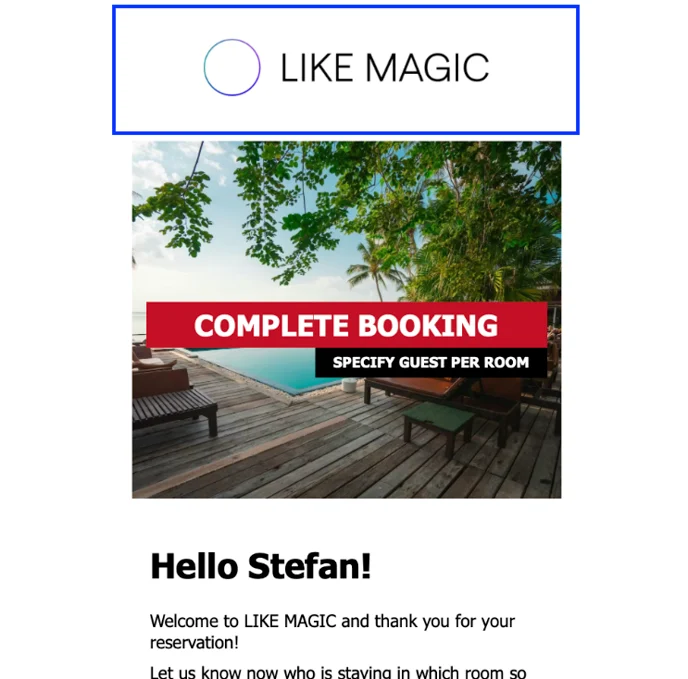
Example of a filled header:
- it is helpful to link the "open the email in a browser" function with the following formula: https://$model.getEmailLink()
Note: A footer update is not applied to existing email messages automatically. Request the sync across all your email messages via a Support Ticket.
c) Hero (Image, Texts and Links)
- "Hero Image": You can select and add an image from Prismic's media gallery by dragging and dropping it or clicking on "Select Image".
Please note: Images must always carry a matching alternative text (EU Accessibility Act 2025).

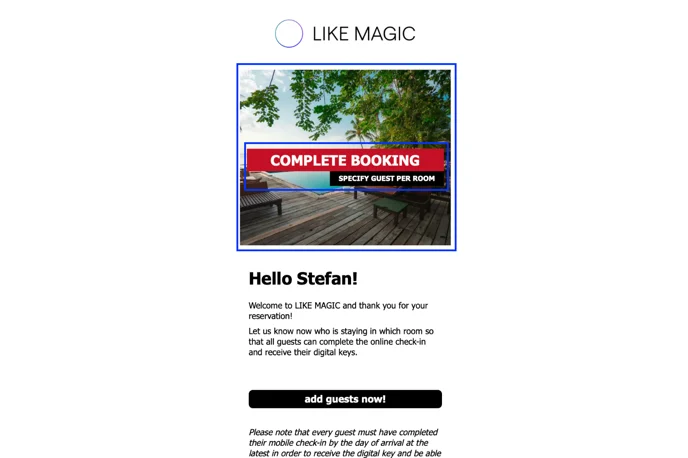
- "Hero Title": Here you can change the title for the text section on the image in the email.
- "Hero Action Link": Here you can enter the link (ideally the same as the "Action Link") for the text in the "Hero Image".
- "Hero Action Text": The label controls the text for the linked text in the hero area of the email.
Tip: Adjust the text so that it is clear and appealing to the recipients and supports the desired action. E.g. "Prepare for your stay now."
Note: The hero element only appears when image, link and text are all set. If one of them is missing, the element is not shown.
d) Text Contents
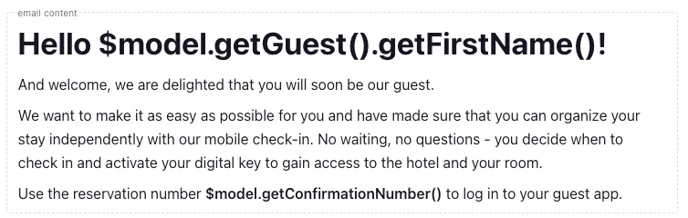
Under "Email Content", you can customise the content of the email as you wish. Here you have the option to edit the text. You can use text formatting such as bold, italics or links to make the content clear and appealing.
Select the relevant text area to open the formatting menu:
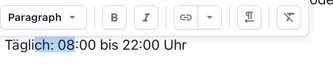
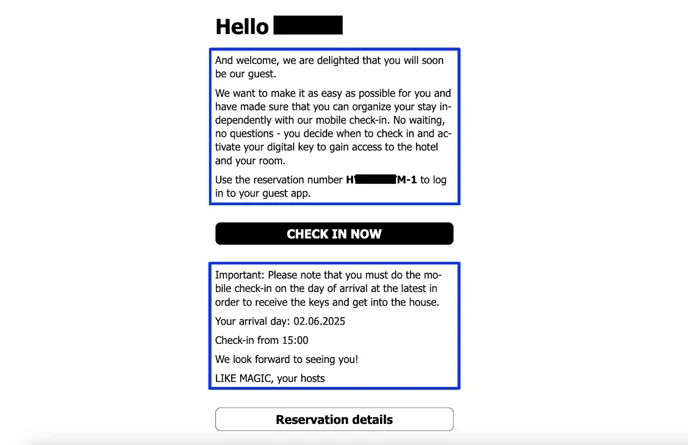
Customise the "Email Content" so that the email meets your requirements and provides clear, targeted communication with your recipients. This is also where the booking ID, i.e. confirmation number, is placed in pre-stay messages using the following formula so that guests can authenticate themselves:
$model.getConfirmationNumber()
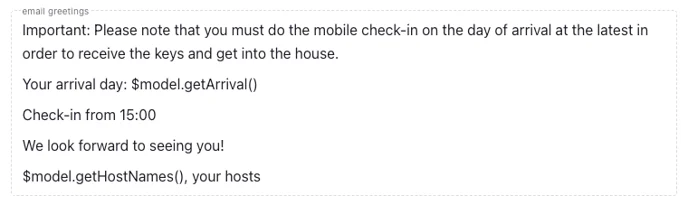
- Under "Email Greetings", you can do the same for the greeting and closing of the email.
e) Call to Action Buttons
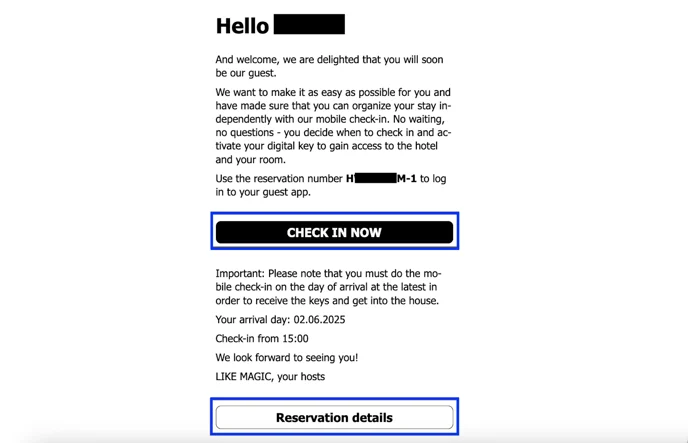
Every email has a purpose. The call-to-action button points to this purpose or helps the reader of the email fulfill it.
- "Action Link": This is where the link for the call-to-action button should be added.
- "Action Text": This label defines the text displayed on the call-to-action button in the email.
There is also a second, more subtle button placed towards the end of the email: the so-called Secondary Action Button. Use this for secondary information, such as a link to the guest’s reservation details or other important links you want to include.
- "Secondary Action Link": This is where the link for this button should be added.
- "Secondary Action Link Text": This label defines the text displayed on this button.
f) Footer
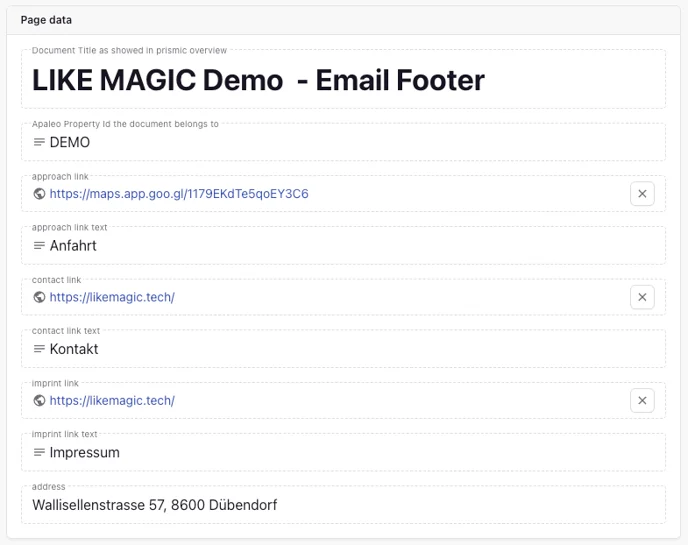
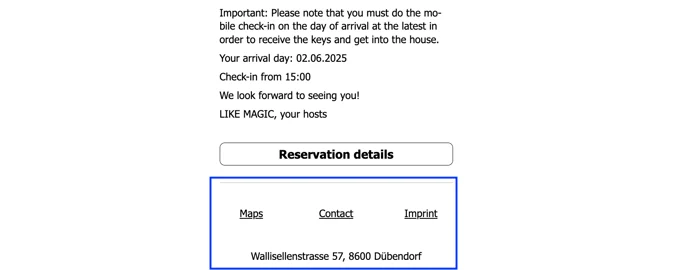
Under "Email Footer", you can do the same as with the header and customise it according to your preferences. The footer is the bottom section of the email and often contains important information such as the address, legal notices or contact information.
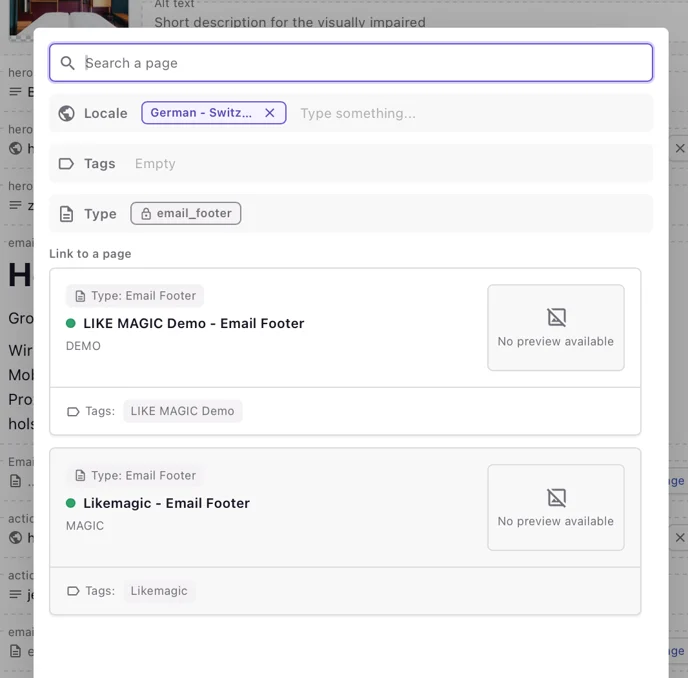
If you want to change the links in the footer, simply select the desired footer (separate Prismic document) and adjust the links. Here you can add links to your legal notice, directions, contact information or other relevant pages.
Make sure that all links are correct and functional. Once you have made the changes, don't forget to save them and then click on "Publish" so that the changes go live and are visible in the emails.
Note: A footer update is not applied to existing email messages automatically. Request the sync across all your email messages via a Support Ticket.
Multi-property setup
If you have a multi-property setup, we recommend using one footer for all ACCOUNT-based messages and one footer for each individual location with the respective addresses.
g) Quote
Some emails end with a quote block: an image and a short text, displayed just above the footer. It is its own Prismic document of type Email Quote, linked from the email template, and exists per property and per language.
You can edit two things:
- Quote image: the picture shown beside the quote (displayed round by default; shape and background colour follow your theme).
- Quote text: the quote itself, as rich text.
ℹ️ If an email template has no Email Quote linked, the block is simply left out. The email still sends. The colours and layout are not edited in Prismic; they come from your theme (see Theme Configuration).
h) Reservation Table
Booking emails that cover several reservations (for example one booker with multiple rooms) include a reservation table: one card per reservation showing the unit category, the dates, whether the co-traveller invite has been sent, and a button to invite the guest. The card's data and links are generated by the system, what you edit in Prismic is the wording and icons, in a document of type Email reservation table:
- Invite sent: text and icon shown when the invite for a reservation has gone out.
- Invite not sent: text and icon shown when it hasn't.
- Invite guest: the label of the button that opens the invite.
ℹ️ The reservation cards themselves (unit category names, dates, links, colours) are filled in automatically and can't be changed in Prismic.
3. Account-Level Templates (ACCOUNT)
Some Prismic documents carry ACCOUNT instead of a property's PMS ID. These are account-level templates, and they serve two purposes:
- Fallback: when a message is sent for a property that has no property-specific template, LIKE MAGIC falls back to the ACCOUNT document. Keep the ACCOUNT set complete. It is your safety net for new or not-yet-customised properties.
- Account emails: messages that belong to the guest's user account rather than a stay (email verification and password reset), always use ACCOUNT templates. These account emails don't include the "open in browser" link row; only the logo from the header is shown.
💡 In a multi-property setup, maintain one polished ACCOUNT set (header, footer, quote) as the default, and property-specific documents only where a property genuinely differs, for example its footer address.
4. Overview & Preview
Overview
Messages can always be viewed via the Operations Platform: by clicking on the email icon in the message overview.
Preview
A preview per se is not available with Prismic. However, you can still track changes and check whether the adjustments you have made have had the desired effect. Do this in the same way as for articles on the guest platform. Look at the links to see how a message is displayed live. The easiest way to view the messages is using the overview (link(s)) mentioned above.
Here are the steps:
- Customise the email templates (and/or other documents) as desired.
- If the change concerns a global element such as the header (one document stored in multiple messages), request the sync across all messages via a Support Ticket. If not, no action is required in this step.
- Ensure that the message has been customised in all languages.
- Check your customisations using the link to the live environment/live guest message view. If necessary, reload the window if you already had it open before customising.
5. Conclusion
Every part of an email template is edited in Prismic: subject line, header, hero section, content, call-to-action buttons, quote, reservation table and footer. Each template exists per property and per language, with the ACCOUNT set as the fallback.
Leave the technical fields (document title, template type, PMS Property ID) unchanged. For updates to global elements such as the header or footer, request the sync across all emails via a Support Ticket.
Check your changes in the live view after publishing, and repeat them in every language you use.