Configure the Self-Service Kiosk
The Self-Service Kiosk allows your guests to check in and check out independently at your property. This guide explains how to configure your kiosk settings in the Operations Platform, including kiosk-specific options and property-level payment methods.
These settings apply to the V1 Self-Service Kiosk. A newer Kiosk V2 layout also exists. You switch a property to it with the Kiosk V2 Layout switch in the property-level kiosk configuration under Settings → Kiosks. The switch is off unless you turn it on.
1. Feature Overview
Kiosk configuration is split into two areas:
- Property-Level Configuration: Settings that apply across all kiosks at your property, such as allowed payment methods.
- Kiosk-Specific Configuration: Settings that apply to an individual kiosk device, such as the payment terminal, encoder, or rate plan filter (if creating bookings is enabled).
ℹ️ The Operations Platform automatically displays only the settings that are relevant to your property's setup and PMS. If a feature is not supported, the corresponding option will not appear.
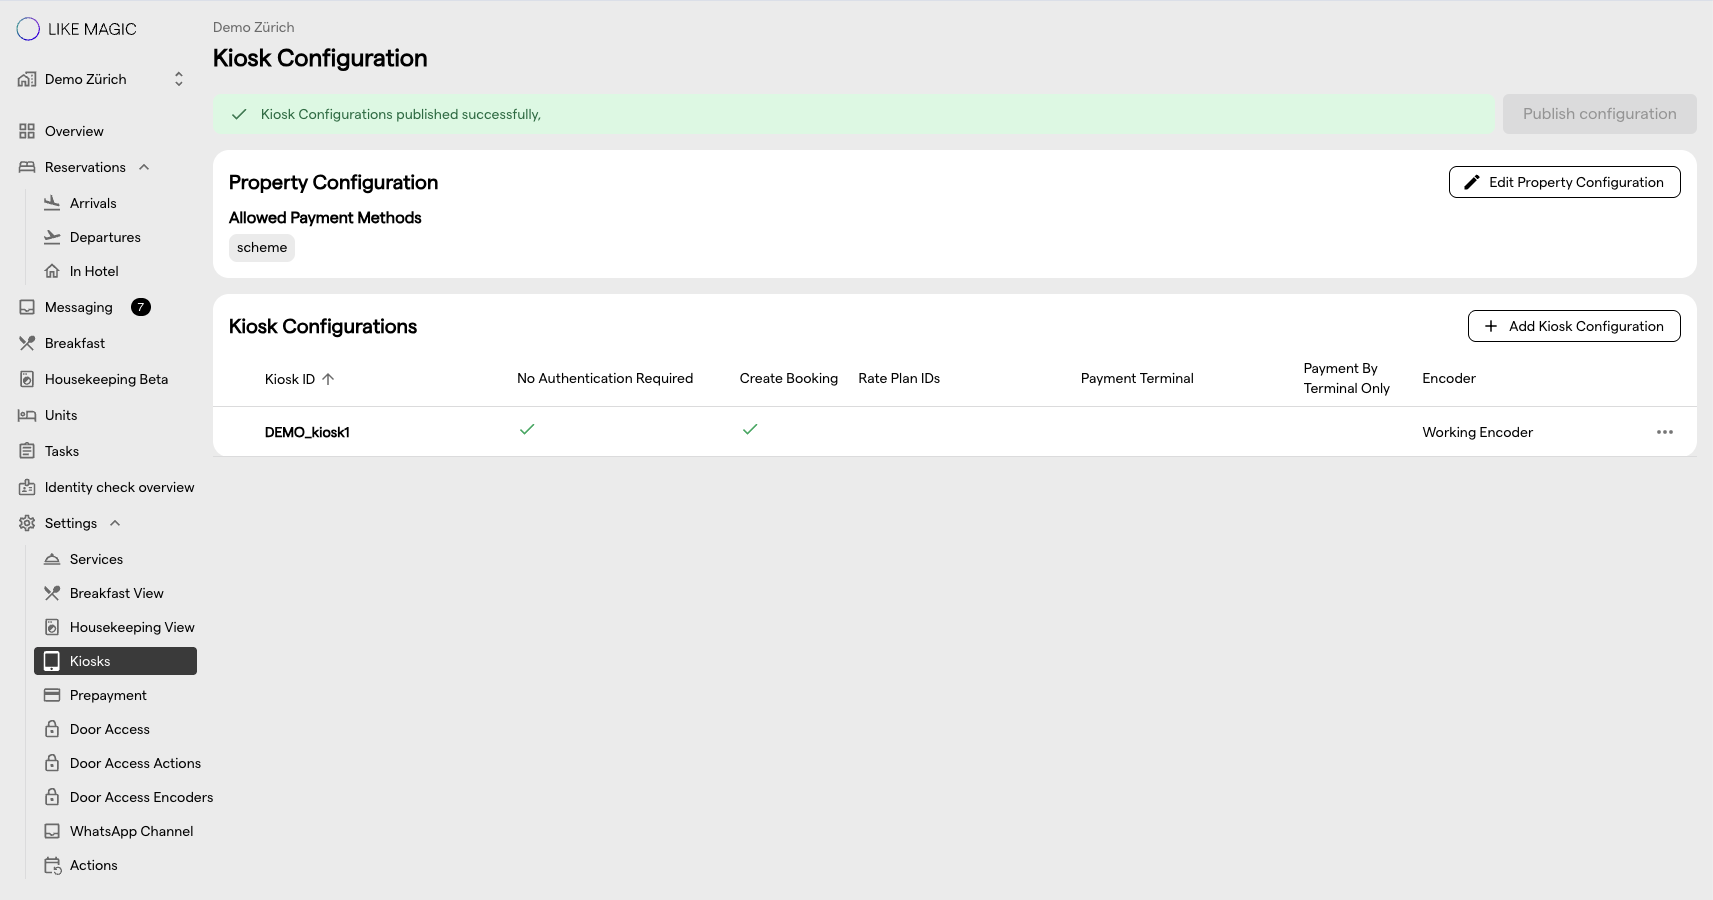
2. Property-Level Configuration
Allowed Payment Methods
If your property uses Adyen, Datatrans or Worldline as a payment provider, you can configure which payment methods guests can use on all Self-Service Kiosks at your property.
ℹ️ This section is only visible for properties using Adyen, Datatrans or Worldline.
The list of available payment methods is based on your property's payment provider settings. Find the Config Keys in the table (not exhaustive) below:
| Payment Method | Config Key |
|---|---|
| Credit Cards | scheme |
| Klarna | klarna |
| Klarna Account | klarna_account |
| Klarna Pay Now | klarna_paynow |
| Sofort/DirectEbanking | directEbanking |
| GiroPay | giropay |
| PayPal | paypal |
| Twint | twint |
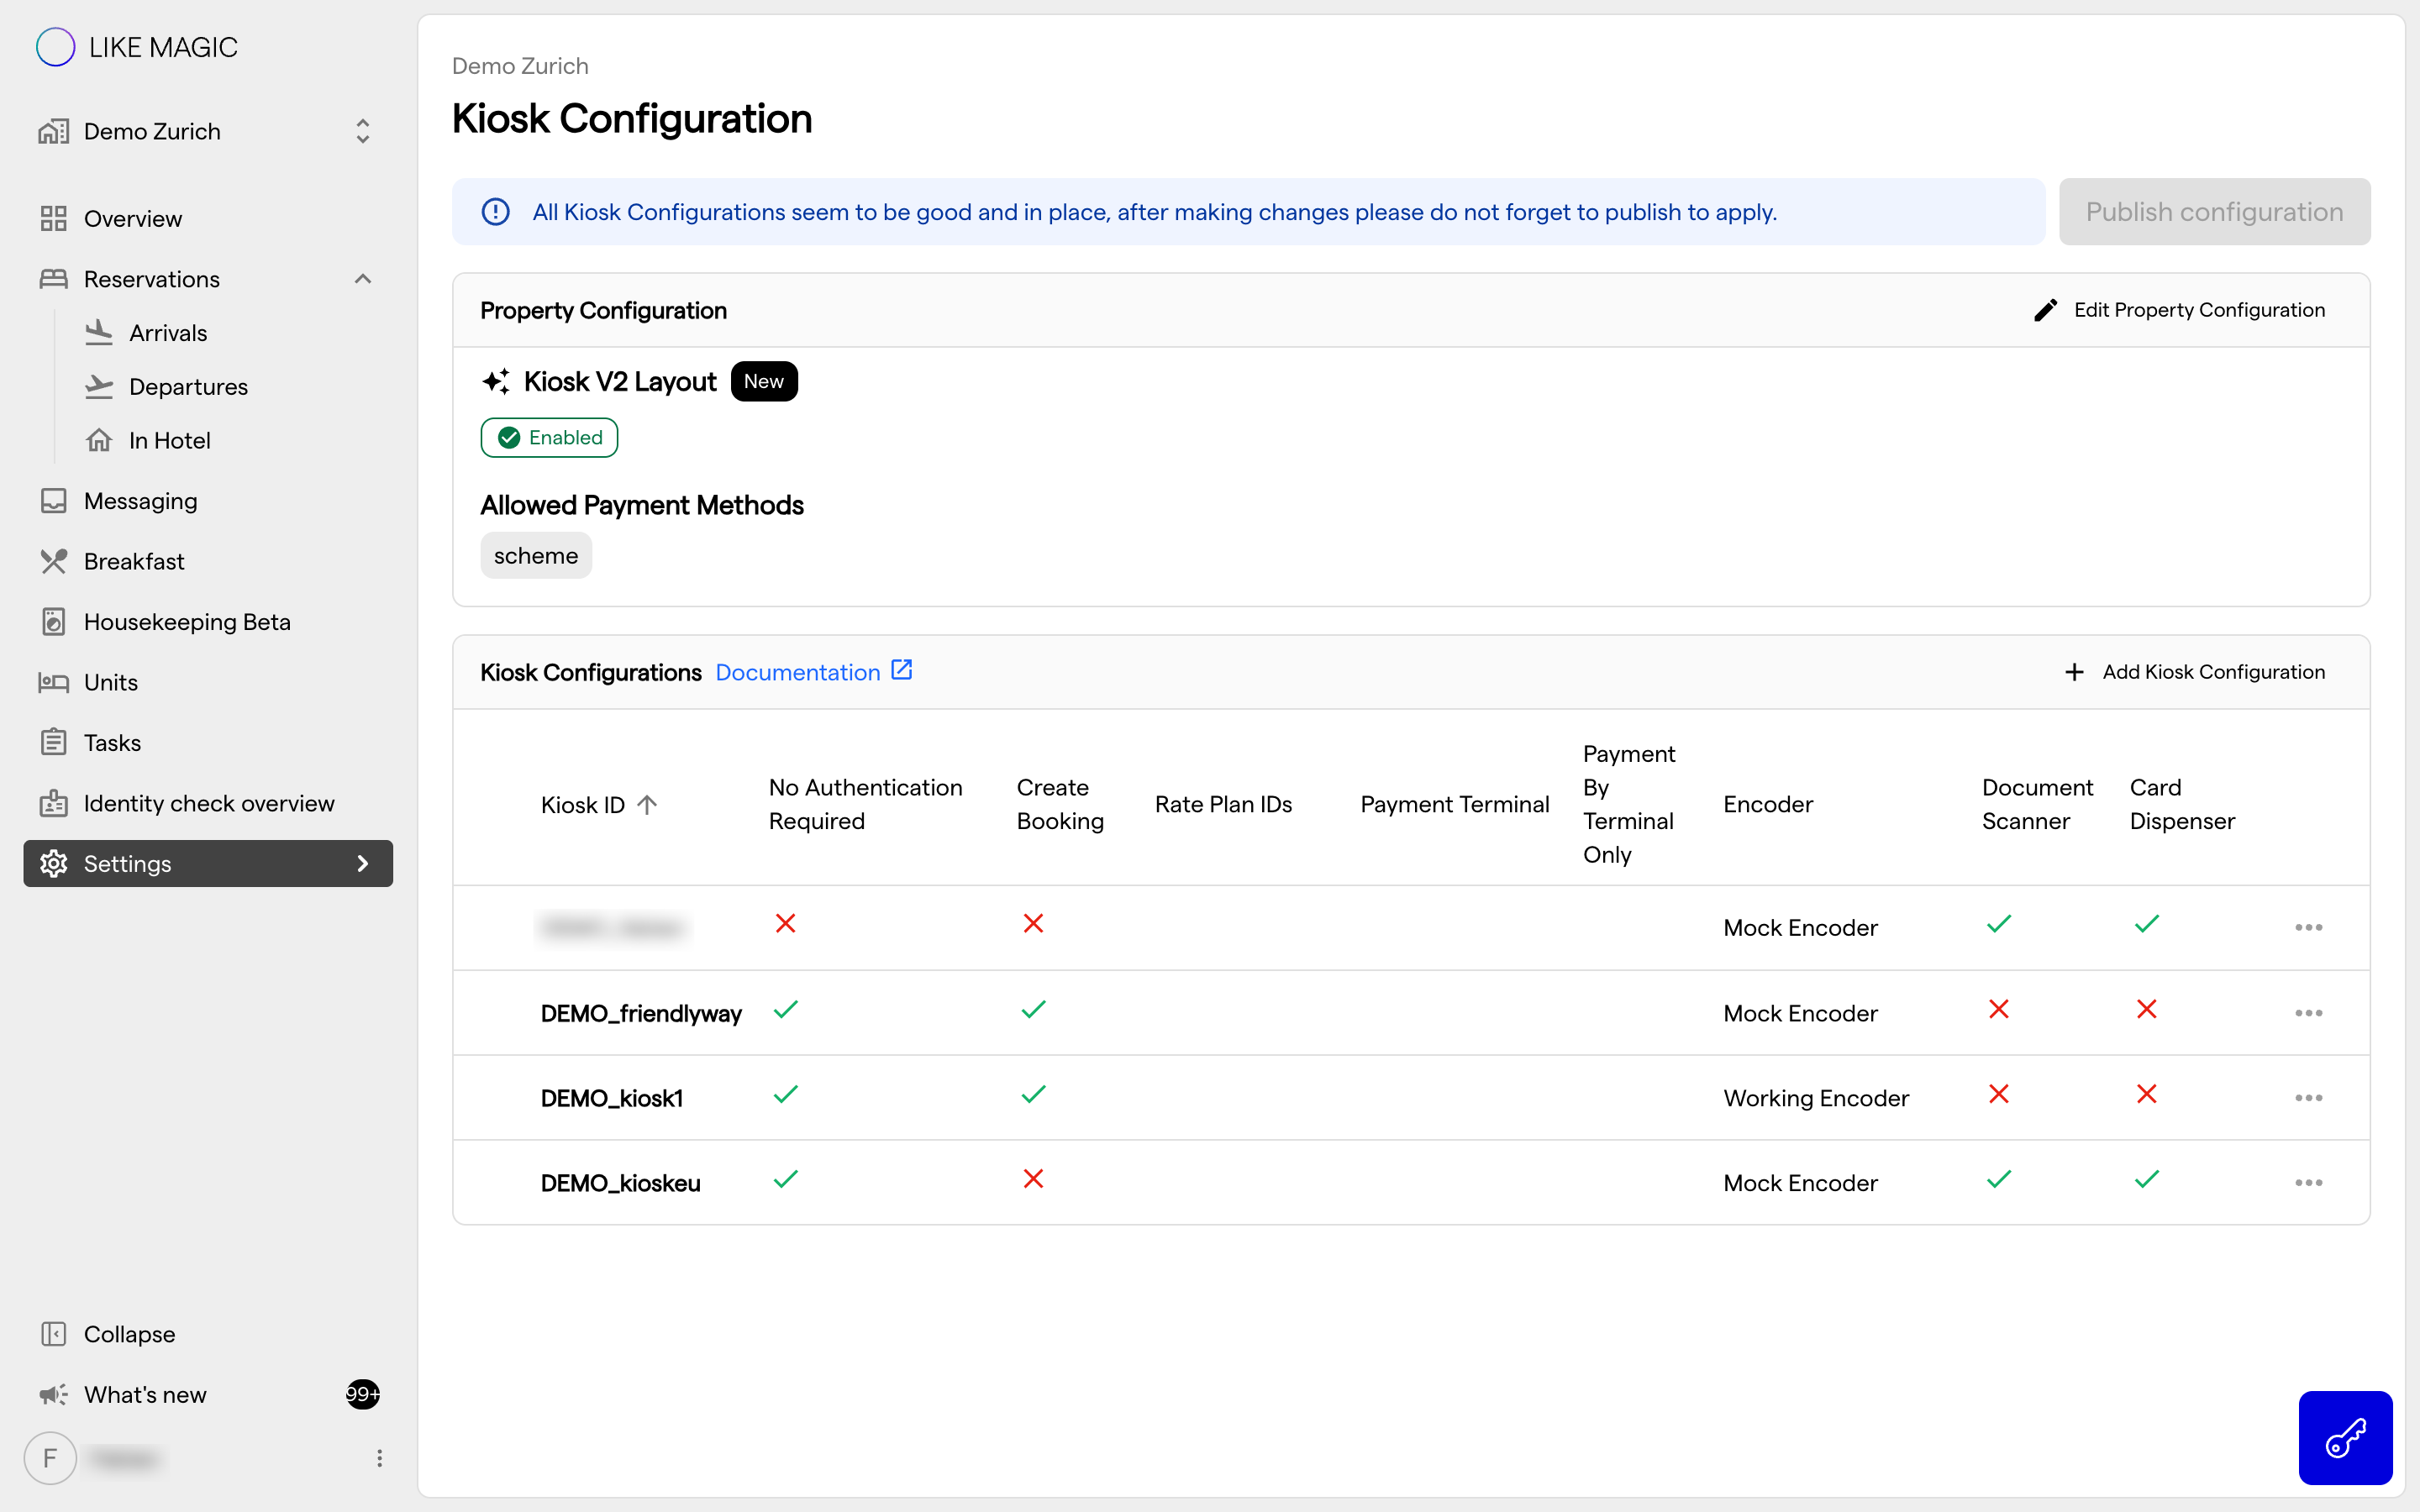
3. Kiosk-Specific Configuration
Each kiosk at your property can be configured individually. Depending on your property's capabilities, the following settings may be available.
a) Kiosk ID
Every kiosk requires a unique ID across your entire account. You assign this ID when creating a new kiosk.
⚠️ The Kiosk ID must be unique. If you enter an ID that is already in use, you will see an error after clicking Save.
b) No Authentication Required
This switch decides whether guests who have a user account have to sign in with it at the kiosk.
Turn the switch on to allow kiosk access without authentication.
c) Payment Terminal
If your property supports Terminal Payment, you can link a specific payment terminal to a kiosk by entering its terminal ID in Payment Terminal.
✍️ This setting is hidden on properties running on Mews. Every other PMS shows it.
⚠️ After you select a payment terminal, the switch Payment by Terminal Only appears. With it on, the kiosk offers terminal payment only and the Allowed Payment Methods defined above no longer apply to it.
d) Encoder
If your property uses physical Key Cards, you can assign an Encoder to the kiosk. The encoder must match one of the available encoders registered for your property.
⚠️ If the configured encoder does not match any available encoder at your property, a conflict will be displayed.
e) Rate Plan Filter
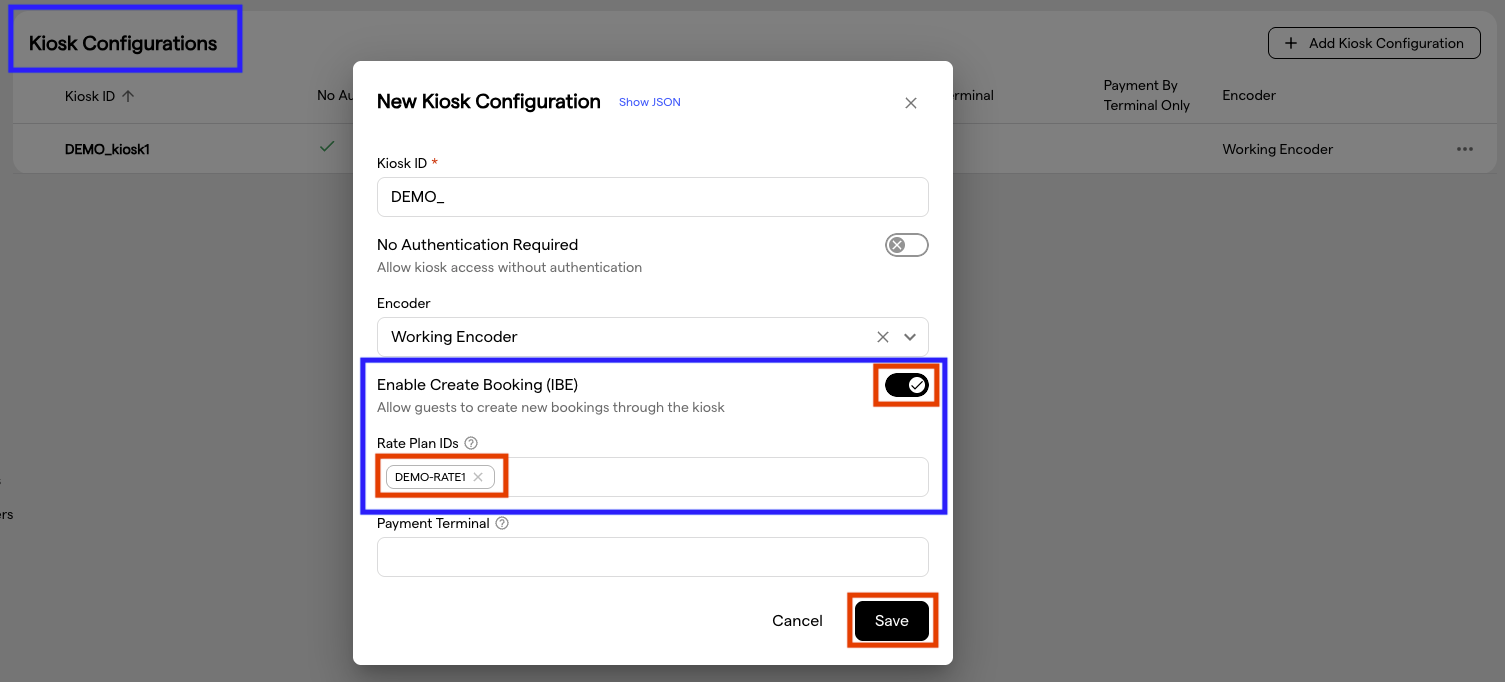
On properties running on Apaleo, switch on Enable Create Booking (IBE) for the kiosk and the Rate Plan IDs field appears, so you can filter which rate plans the kiosk offers.
✍️ The field is shown only on Apaleo properties, and only while Enable Create Booking (IBE) is on for that kiosk.
f) Document Scanner
Turn on Document Scanner to connect a passport or ID scanner to this kiosk. Choose the Type (DESKO or OneConnect) and enter the device's connection details. Once the kiosk is saved, the panel reports whether the scanner is reachable and which firmware it runs.
g) Card Dispenser
Turn on Card Dispenser to connect a key-card dispenser to this kiosk. Choose the Type (CRT-571 or OneConnect) and enter the device's connection details. Once the kiosk is saved, the panel reports whether the dispenser is reachable, how full its card stacker is and whether the error bin is full.
4. Understanding and Resolving Conflicts
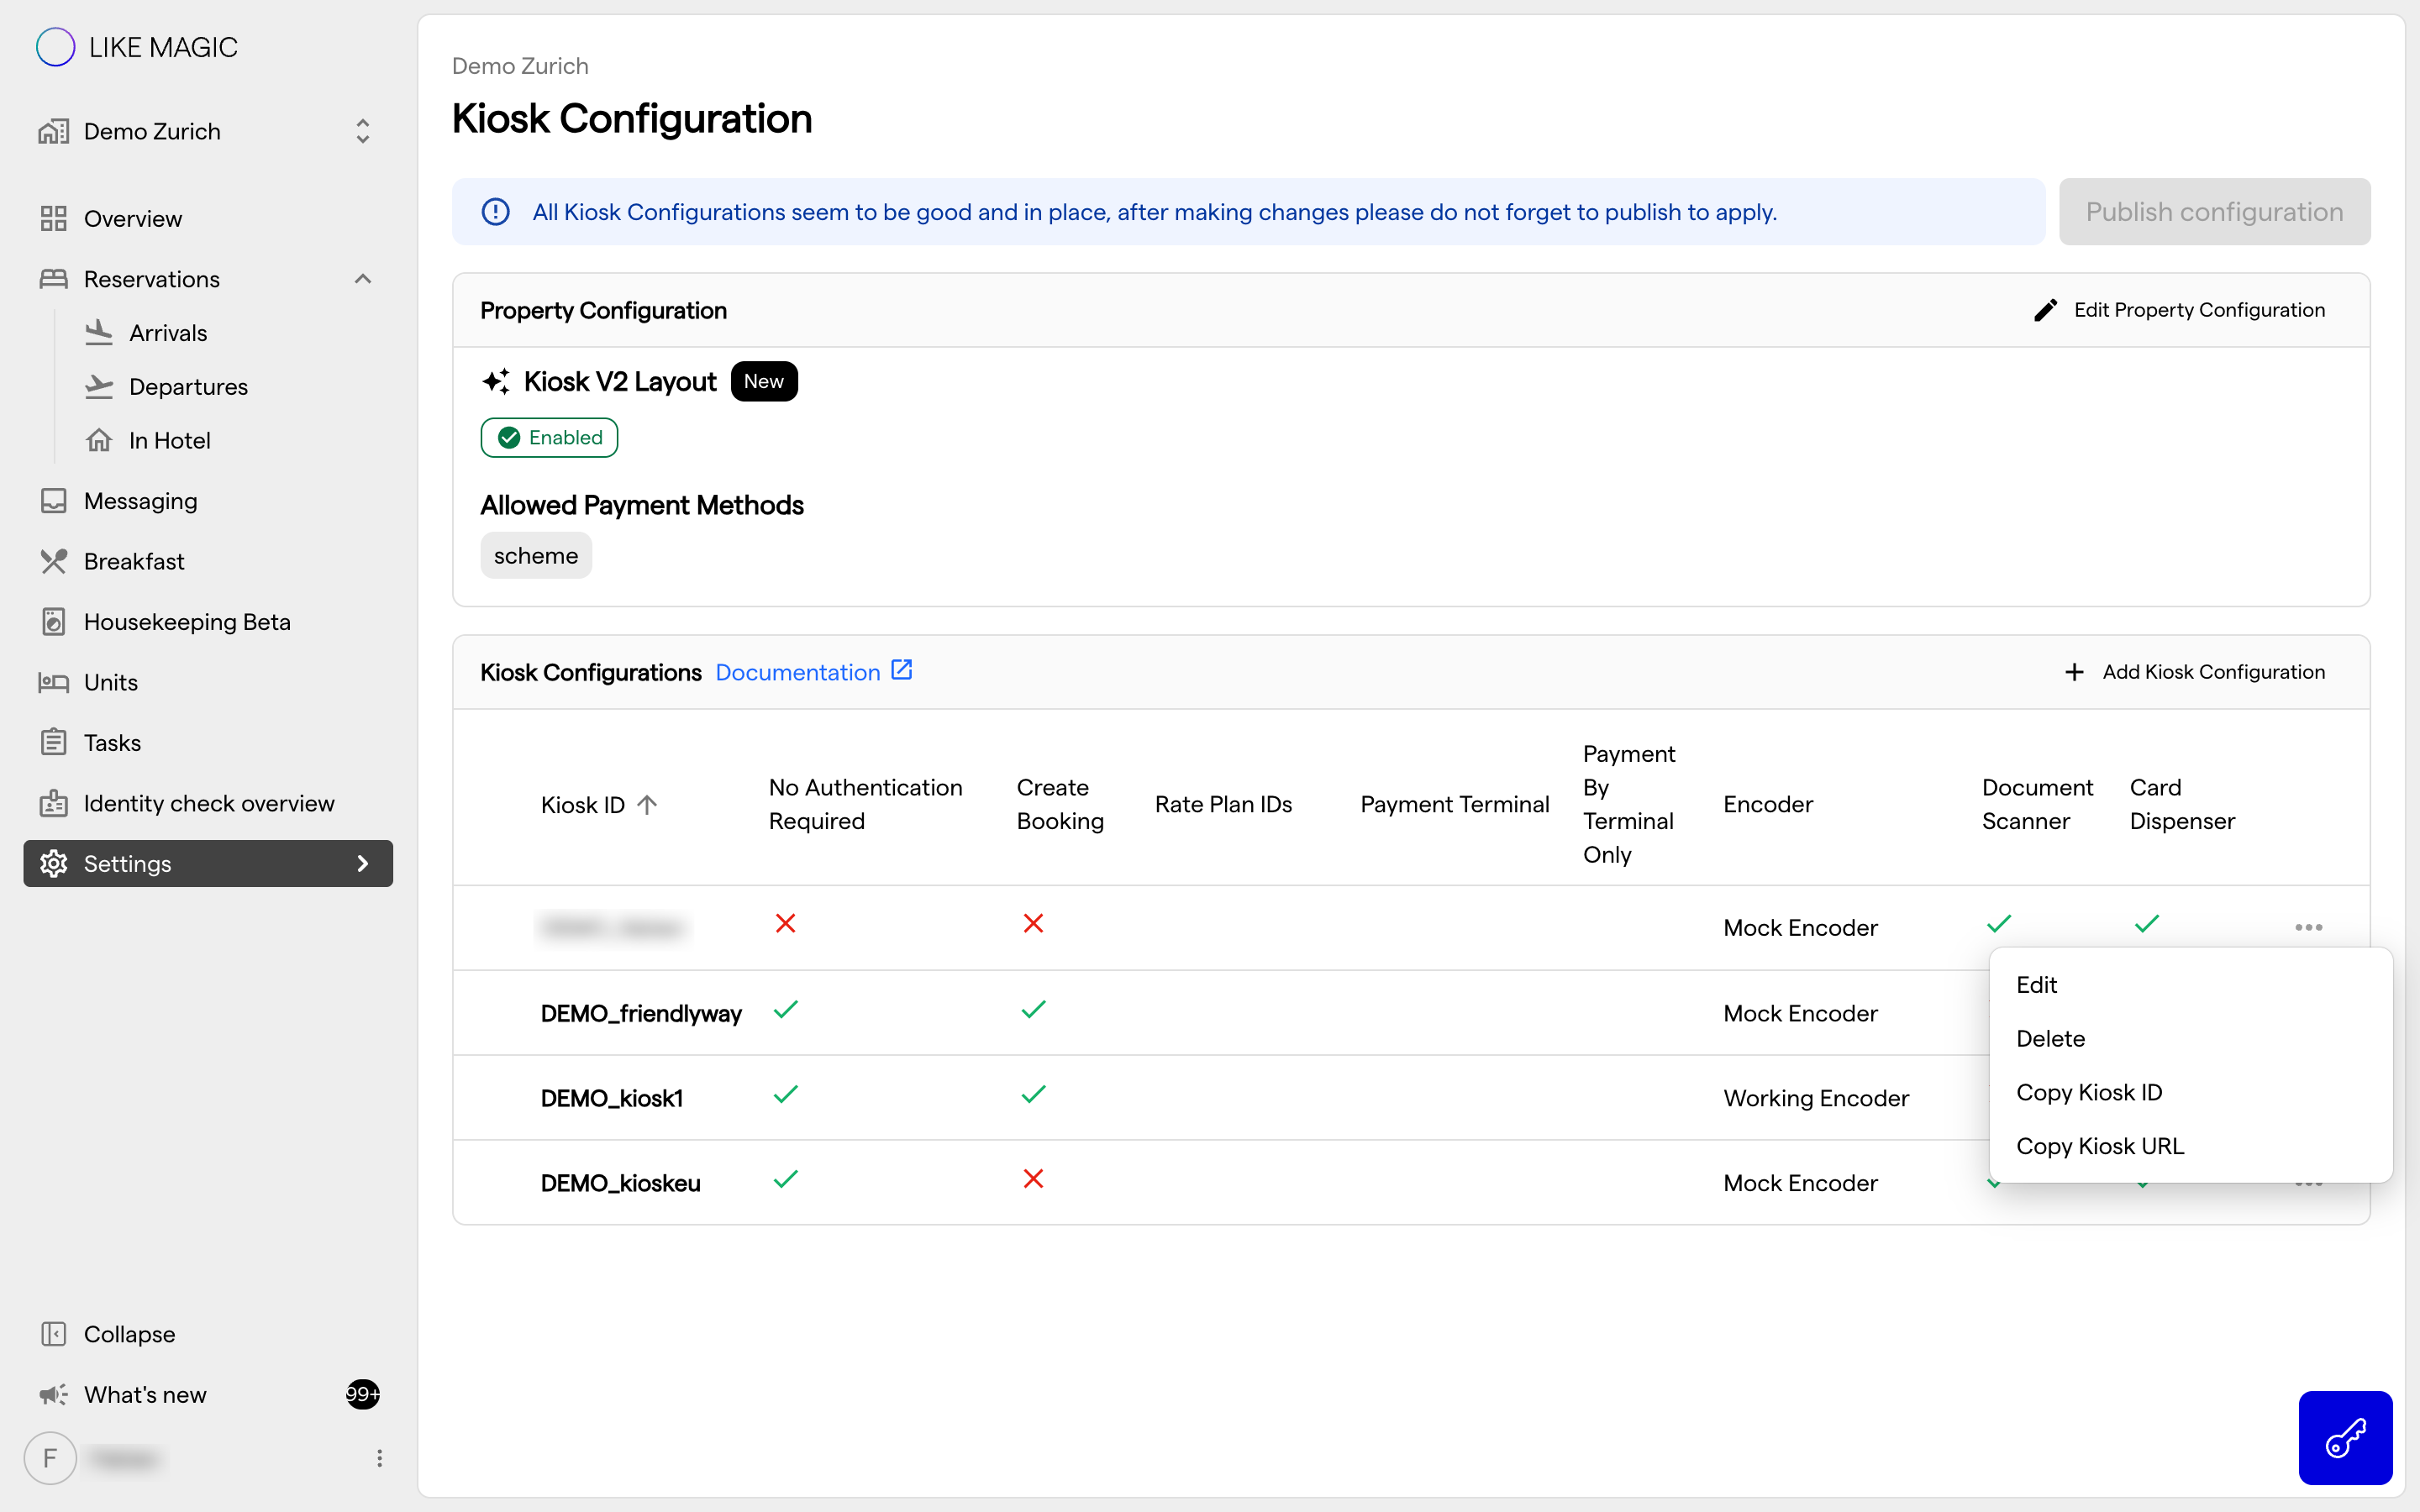
A conflict occurs when a kiosk setting is invalid or incompatible with your property's current capabilities. The Operations Platform helps you identify and resolve these issues.
How Conflicts Are Displayed
- ❌ In the kiosk list, an expand button appears next to any kiosk that has a conflict.
- ❌ In the edit modal, the conflict is highlighted in the header so you can address it immediately.
Common Conflicts and How to Resolve Them
| Conflict | What It Means | How to Resolve |
|---|---|---|
| Duplicate Kiosk ID | Another kiosk in your account already uses this ID. | Choose a unique Kiosk ID. |
| Invalid characters | A Kiosk ID, Rate Plan ID, or Terminal ID contains unsupported characters. | Remove special or invalid characters. |
| Encoder not found | The configured encoder does not match any available encoder at your property. | Select a valid encoder or remove the setting. |
| Terminal required but missing | Terminal-only payment is enabled, but no Terminal ID is configured. | Add a Terminal ID or disable terminal-only payment. |
| Terminal not supported | A Terminal ID is configured, but your PMS does not support Terminal Payment. | Click the X next to the Terminal ID to remove it, then click Save. |
| Rate Plans not supported | Rate Plan IDs are configured, but your PMS does not support rate plan filtering. | Remove the Rate Plan IDs. |
5. Setting up Kiosk Devices
You can choose which tablet you use for your Self-Service Kiosk. Here are the setup guides:
Setup guide for iOS: Self-Service Kiosk Setup (iOS)
Setup guide for Android: Self-Service Kiosk Setup (Android)
6. Reservation Lookup for External Reservations
Some reservations arrive from external channels (for example a channel manager, an OTA, or a GDS) with only a guest name and the stay dates. Your Property can let those guests identify themselves on name and stay dates alone, without any verification field, so they can complete check-in at the kiosk on their own.
This is controlled by the External Reservation setting under Settings → Guest Access, not in the kiosk configuration, and it is off by default. See Configure Guest Access, section External Reservation, for what it does, the security trade-off, and how to switch it on.
a) What the Guest Experiences at the Kiosk
With the setting switched on, a guest whose reservation came from an external channel enters their name and stay dates and reaches their reservation. Anything they type into the verification field is ignored. If several reservations match, the guest picks theirs from a list of all matches.
The kiosk is not treated differently from the other entry points. The same setting governs the Digital Guest Portal, Info Stay, and the Guest Journey before the day of arrival.
ℹ️ Eligible reservations are Confirmed, or In-House while the Unit is not yet clean. Bookings from the Booking Engine or entered directly always require the configured verification field.
b) Troubleshooting
If a guest sees “no reservation found”:
- Check that External Reservation is switched on for this Property under Settings → Guest Access. While it is off, reservations from external channels need the configured verification field like any other.
- Confirm the entered name and stay dates match what the channel sent.
- Confirm the reservation is Confirmed, or In-House waiting for a clean Unit.
ℹ️ To protect guest data, repeated lookup attempts are rate-limited.
👤 Staff can always look the reservation up in the Reservations Overview and complete check-in manually.
7. Conclusion
The kiosk configuration decides what your guests can do at the kiosk: which payment methods they can use, which encoder issues their key, and which terminal takes their payment. Property-level settings apply to every kiosk at the property, kiosk-specific settings only to that device.