Set Up and Manage Second Screen Devices
The Second Screen turns a tablet at your front desk into a guest-facing display. During check-in, guests review and confirm their own details and sign the Digital Registration Form; during check-out, they review and confirm their Folio. This guide shows you how to set up and manage your Second Screen devices.
1. Who Can Use This Feature?
Second Screen is not available for properties running on Apaleo.
You set up and manage Second Screen devices in the Settings of the Operations Platform, so you need an administrator role (for example, Account Administrator or Property Admin). Team members with a view-only role can see your devices but cannot change them.
Once a device exists, front-desk staff with the Host or an administrator role can use it during check-in and check-out. No extra setup is needed.
2. How Second Screen Works
A Second Screen is the LIKE MAGIC guest app running in a special mode on a device you place at reception. You stay in control from the reservation in the Operations Platform, while the guest interacts on the second device.
You can use it for two moments:
- 🛎️ Check-in: hand over the Digital Registration Form so the guest can review their details, choose their preferences, accept the terms, and sign.
- 🛎️ Check-out: show the guest their Folio (the bill for their stay) so they can review the charges and confirm.
There are two ways to run it:
- A dedicated device: a tablet that stays at the front desk and is always ready.
- A Roaming device: the device you already run the Operations Platform on. Sharing to it opens a second browser tab that you hand to the guest and take back.
When no guest is active, the device shows an idle start screen with your property's background images and a QR code to your Digital Guest Journey.
What the guest sees
From the guest's side, the Second Screen is a calm, focused display that only ever shows the current moment, never your Operations Platform, other reservations, or navigation:
- While idle: an attract start screen with your property's background images and a QR code to your Digital Guest Journey, so a waiting guest can open the journey on their own phone.
- During check-in: only the Digital Registration Form. The guest reviews their details, chooses their preferences, accepts the terms, and signs, in their own language.
- During check-out: only their own Folio to review and confirm.
The guest always interacts alongside your receptionist, who drives each step from the reservation so the guest is never left to navigate on their own.
How you curate the guest experience
- Idle / attract content: the start screen draws on your property's background images and content (managed in Prismic), so it is the one thing guests see between check-ins. Keep it current and on-brand.
- Language: the display follows the guest's own language selection on the device. If it looks wrong, the guest can reselect it and it will stick (see Multi Language Support).
- What appears: only the step you share from the reservation is ever shown; nothing else about the property or other guests is exposed.
3. Set Up a Second Screen Device
Setting up a dedicated device has three parts: create it in Settings, connect the tablet, and lock the tablet to the app.
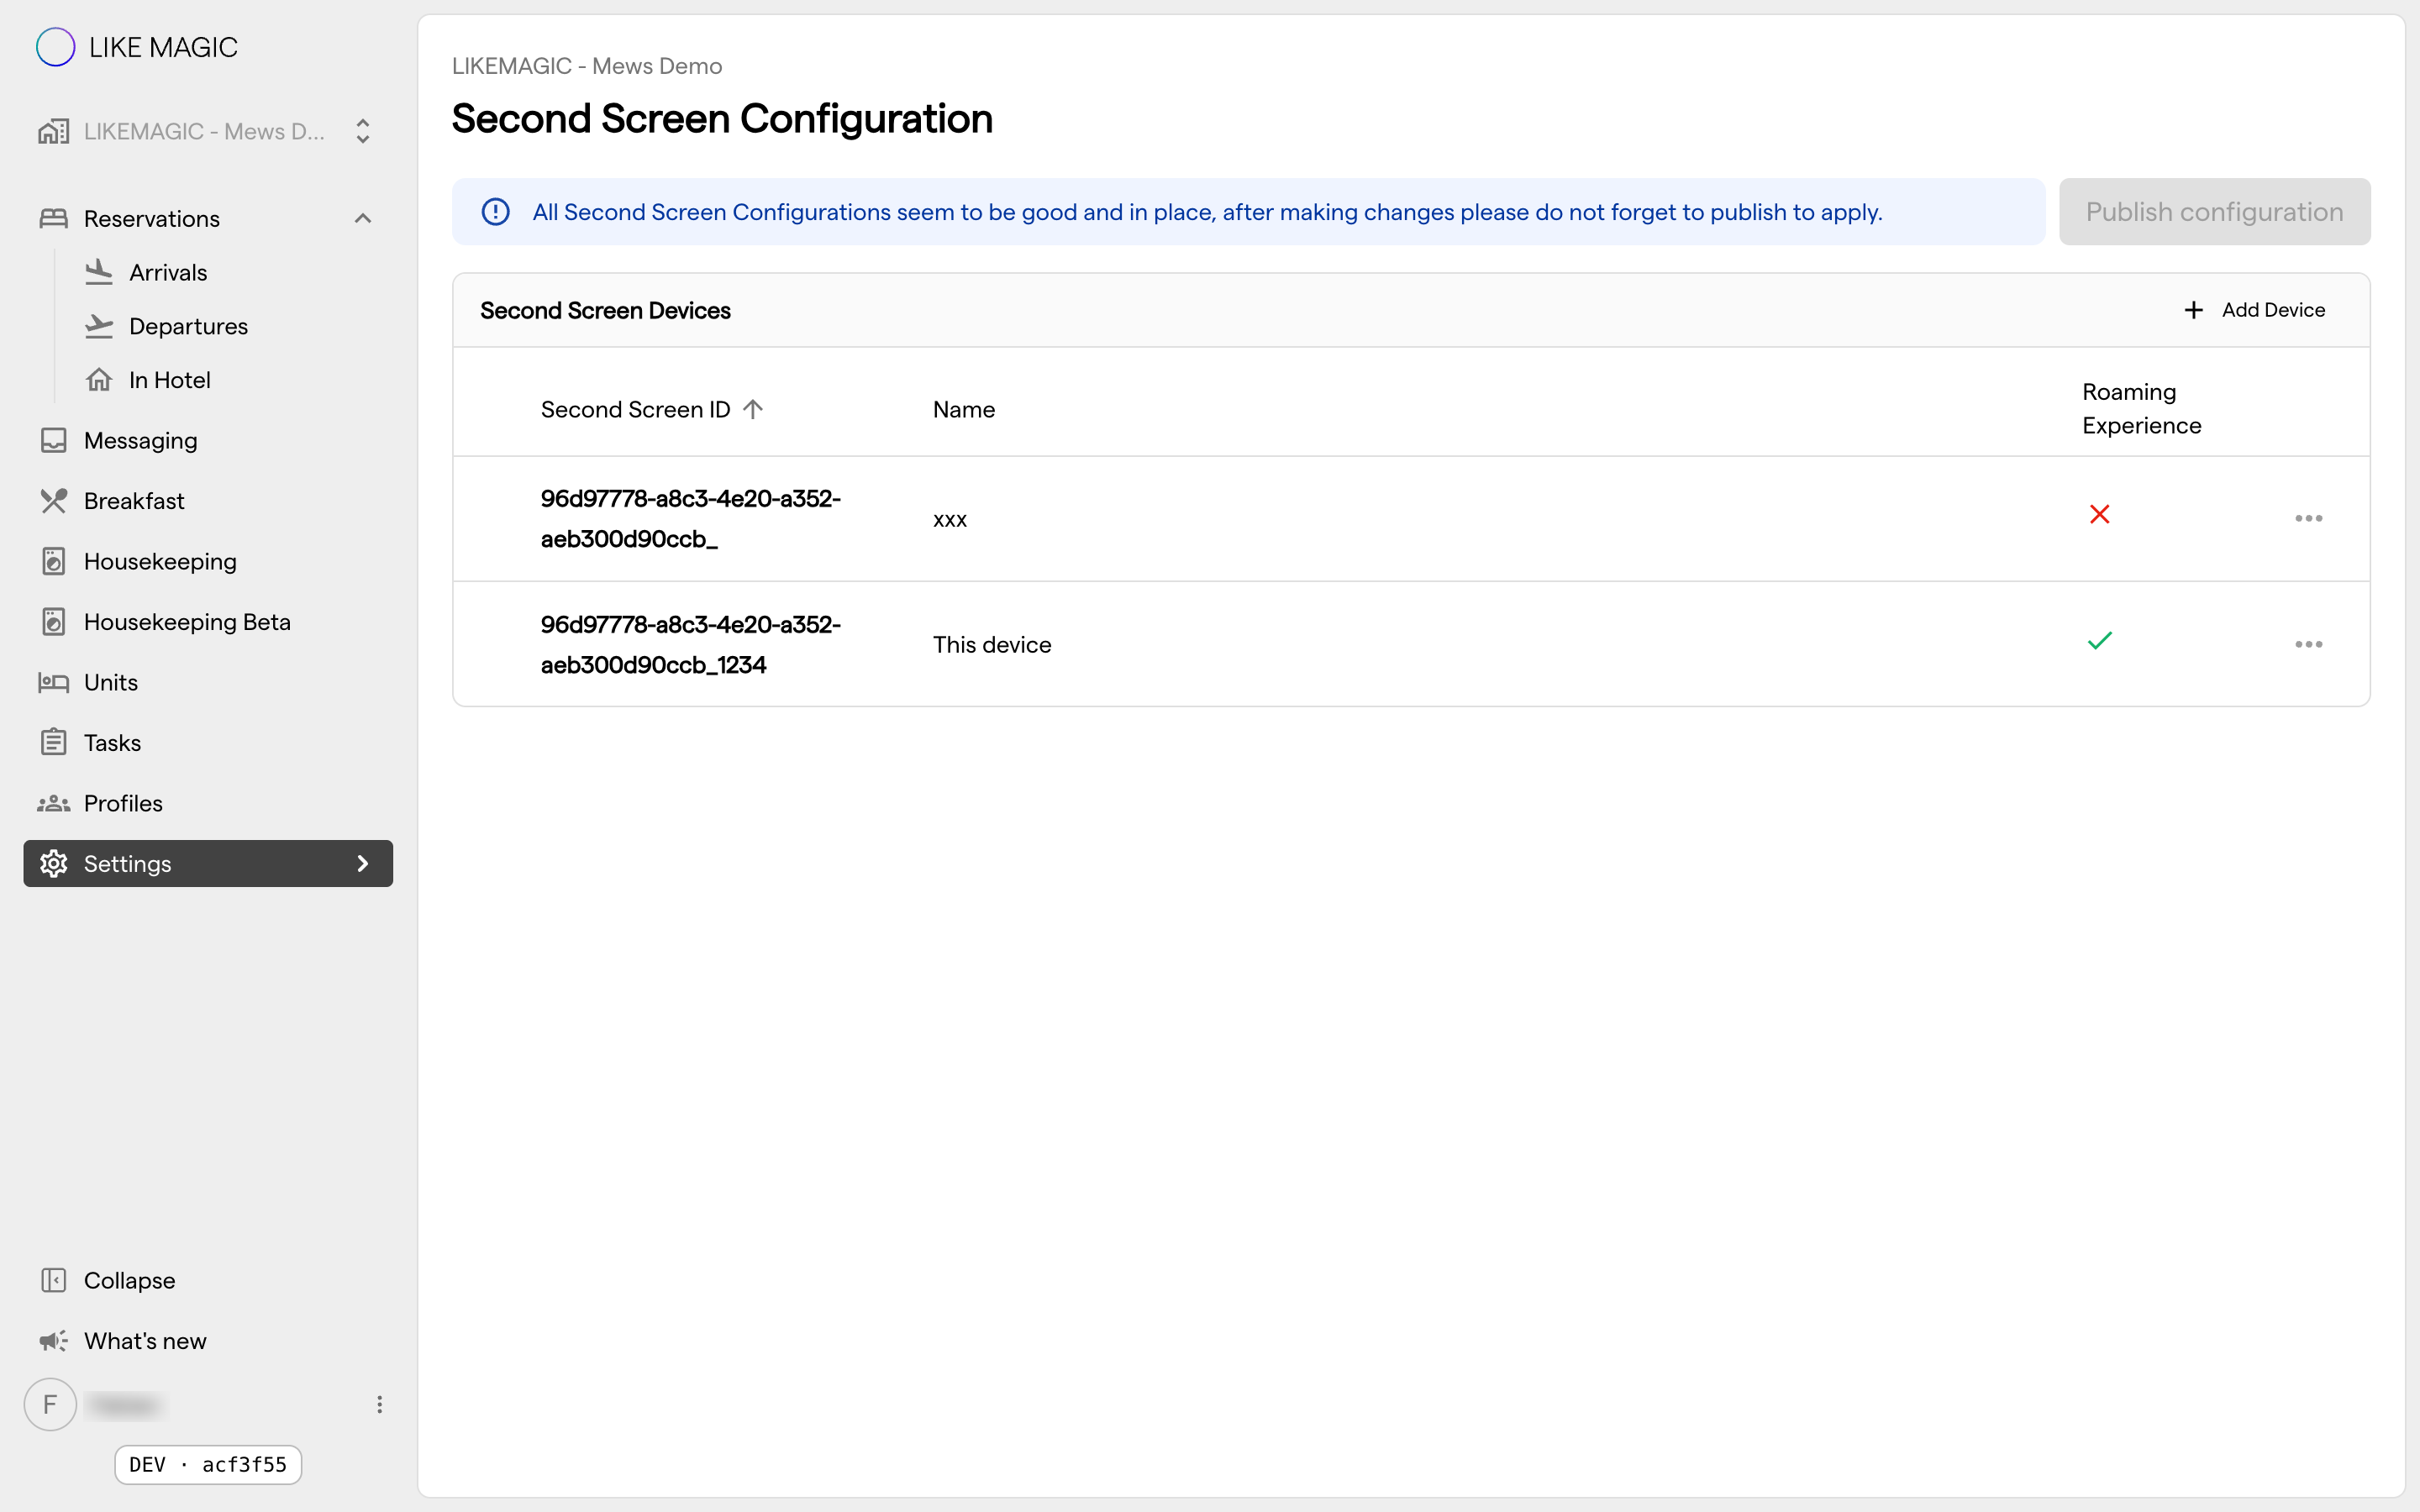
a) Create the device in Settings
- In the Operations Platform, go to Settings and open Second Screens.
- Select Add Device.
- Enter a Second Screen ID. The field is prefilled with your property code. Add a short, unique label after it (letters, numbers, dashes, or underscores). Use something that tells you where the device is, such as the reception desk it sits on.
- Enter a Name. This is the label you will see when you share to the device.
- Select Save, then Publish configuration to make the device active.
Nothing is active until you publish. If you see a banner prompting you to publish your changes, please select it.
b) Connect the device
On the tablet at your front desk:
- In Settings → Second Screens, open the device's action menu (⋮) and select Copy URL. Confirm the trusted-device note.
- Open that link in the tablet's browser (Safari on iPad, Chrome on Android).
- Add the page to the home screen so it opens like an app (use the browser's share menu, then Add to Home Screen).
- Open it from the home screen. The device is now connected and shows the idle start screen.
✍️ Alternative setup: open your property's guest web address directly, add it to the home screen, then tap three times with two fingers on the screen to open the setup and enter the Second Screen ID (use Copy ID in the action menu).
c) Lock the device to the app
To keep guests inside the app, lock the tablet to it:
- On iPad: turn on Guided Access in the tablet's settings, then start it while the app is open.
- On Android: turn on Screen Pinning in the tablet's settings, then pin the app.
Some tablets call this a "kiosk mode". This is the tablet's own lock feature and has nothing to do with the LIKE MAGIC Self-Service Kiosk.
4. Set Up a Roaming Device
A Roaming device lets you use your own reception screen instead of a separate tablet. That is handy if you only occasionally hand a screen to a guest.
- In Settings → Second Screens, select Add Device.
- Turn on the Roaming Experience switch. The name is set for you, and you only need a Second Screen ID.
- Select Save, then Publish configuration.
When you share to a Roaming device during check-in or check-out, it opens in a new browser tab. Hand your device to the guest for the steps, take it back when they are done, and return to the Operations Platform. After the guest confirms, you will see a note to take the device back rather than the screen resetting on its own.
5. Manage Your Devices
In Settings → Second Screens, each device has an action menu (⋮):
- Edit: change the name or details.
- Delete: remove the device (you will be asked to confirm).
- Copy ID / Copy URL: get the device's ID or its direct link again, for example when setting up a replacement tablet.
Remember to select Publish configuration after any change, otherwise it will not take effect.
6. Troubleshooting
The "Share to" option does not appear on the reservation.
No device is set up for that property yet, or your changes are not published. Add a device in Settings → Second Screens and select Publish configuration. Also check which PMS your property runs on. Second Screen is not available on Apaleo.
The tablet shows the Self-Service Kiosk instead of the Second Screen.
The tablet was opened with the wrong link, or it was used as a Self-Service Kiosk before. Re-open it using Copy URL from Settings, or clear the app's website data and enter the Second Screen ID again.
The tablet shows a blank screen.
Note the device name and the time it happened.
The device returned to the start screen on its own.
This is normal. For security, the device resets to the idle start screen after about 10 minutes without activity, with a short warning beforehand. Simply share to it again.
The language changed unexpectedly during check-in.
The guest can reselect their language on the device, and it will then stay.
The device is not responding.
Note the device name and the time, then try again.
7. FAQs
What devices can I use?
Any modern tablet with an up-to-date browser works well: for example an iPad with Safari or an Android tablet with Chrome.
Do I need a separate tablet?
No. A Roaming device lets you use your own reception screen. A dedicated tablet is more convenient if you use Second Screen often.
Can guests use the Second Screen on their own?
No. Staff always start each check-in or check-out from the reservation in the Operations Platform.
Why does the device go idle after a few minutes?
This protects guest data when no one is using it. The timing is fixed and cannot be changed.
Is Second Screen available on my system?
It is not available for properties running on Apaleo.
8. Conclusion
Once your devices are set up and published, your team can hand the Digital Registration Form and the Folio to a guest from the reservation, and the guest reviews, confirms and signs on the second device.
📝 Related articles: