Apaleo (Set Up Connection)
To connect LIKE MAGIC with the PMS Apaleo, you need to create a Custom App. This guide walks you through the required steps.
Keeping reservations in sync: automatic pull fallback. Apaleo normally notifies LIKE MAGIC of reservation and folio changes in real time through webhooks (push). If those webhook notifications are delayed or interrupted, LIKE MAGIC automatically switches to pulling the changes directly from Apaleo on a short polling interval, then switches back to webhooks once delivery recovers. This fallback is on by default and runs behind the scenes. There is no toggle for your team to manage, and no action is needed while Apaleo's webhooks are interrupted. Reservations and folios stay in sync either way.
1. Requirements
- You need to have Account Admin rights in your Apaleo account.
- Make sure you are on the Account level.
2. Instructions
a) Add a Custom App
- Go to Apps > Connected Apps
- Click on Add a new app
- Select Add custom app


b) Configure the custom app
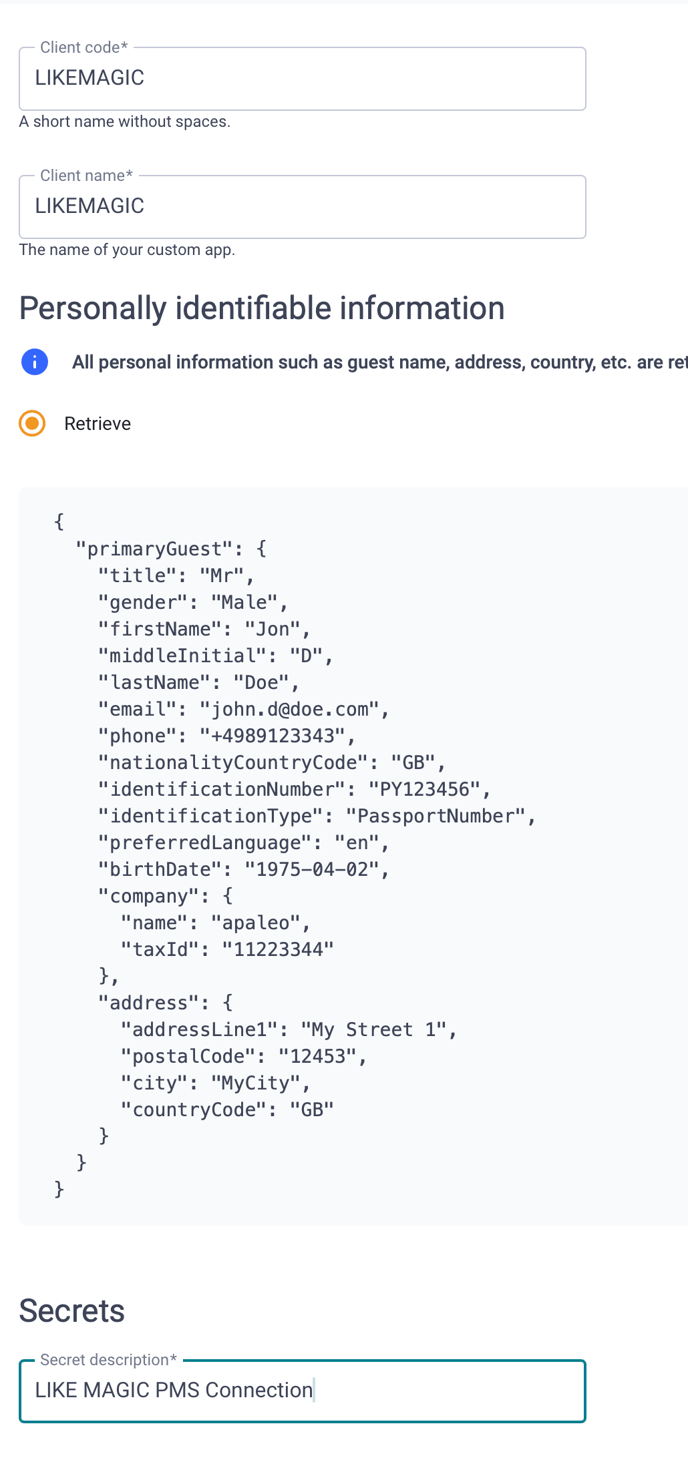
Fill in the fields as follows:
| Field | Value |
|---|---|
| Client code | LIKEMAGIC |
| Client name | LIKEMAGIC |
| Personally identifiable information | Retrieve |
| Secret description | LIKE MAGIC PMS Connection |
c) Define scopes for the API
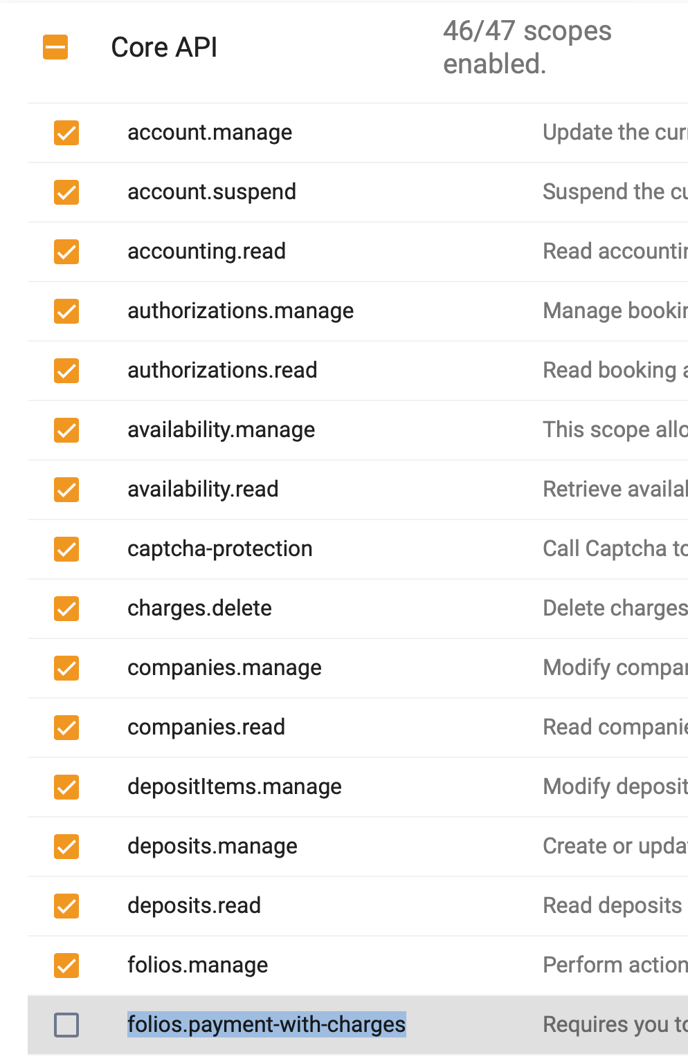
Core API
Enable all scopes except:
folios.payment-with-charges(please deselect)
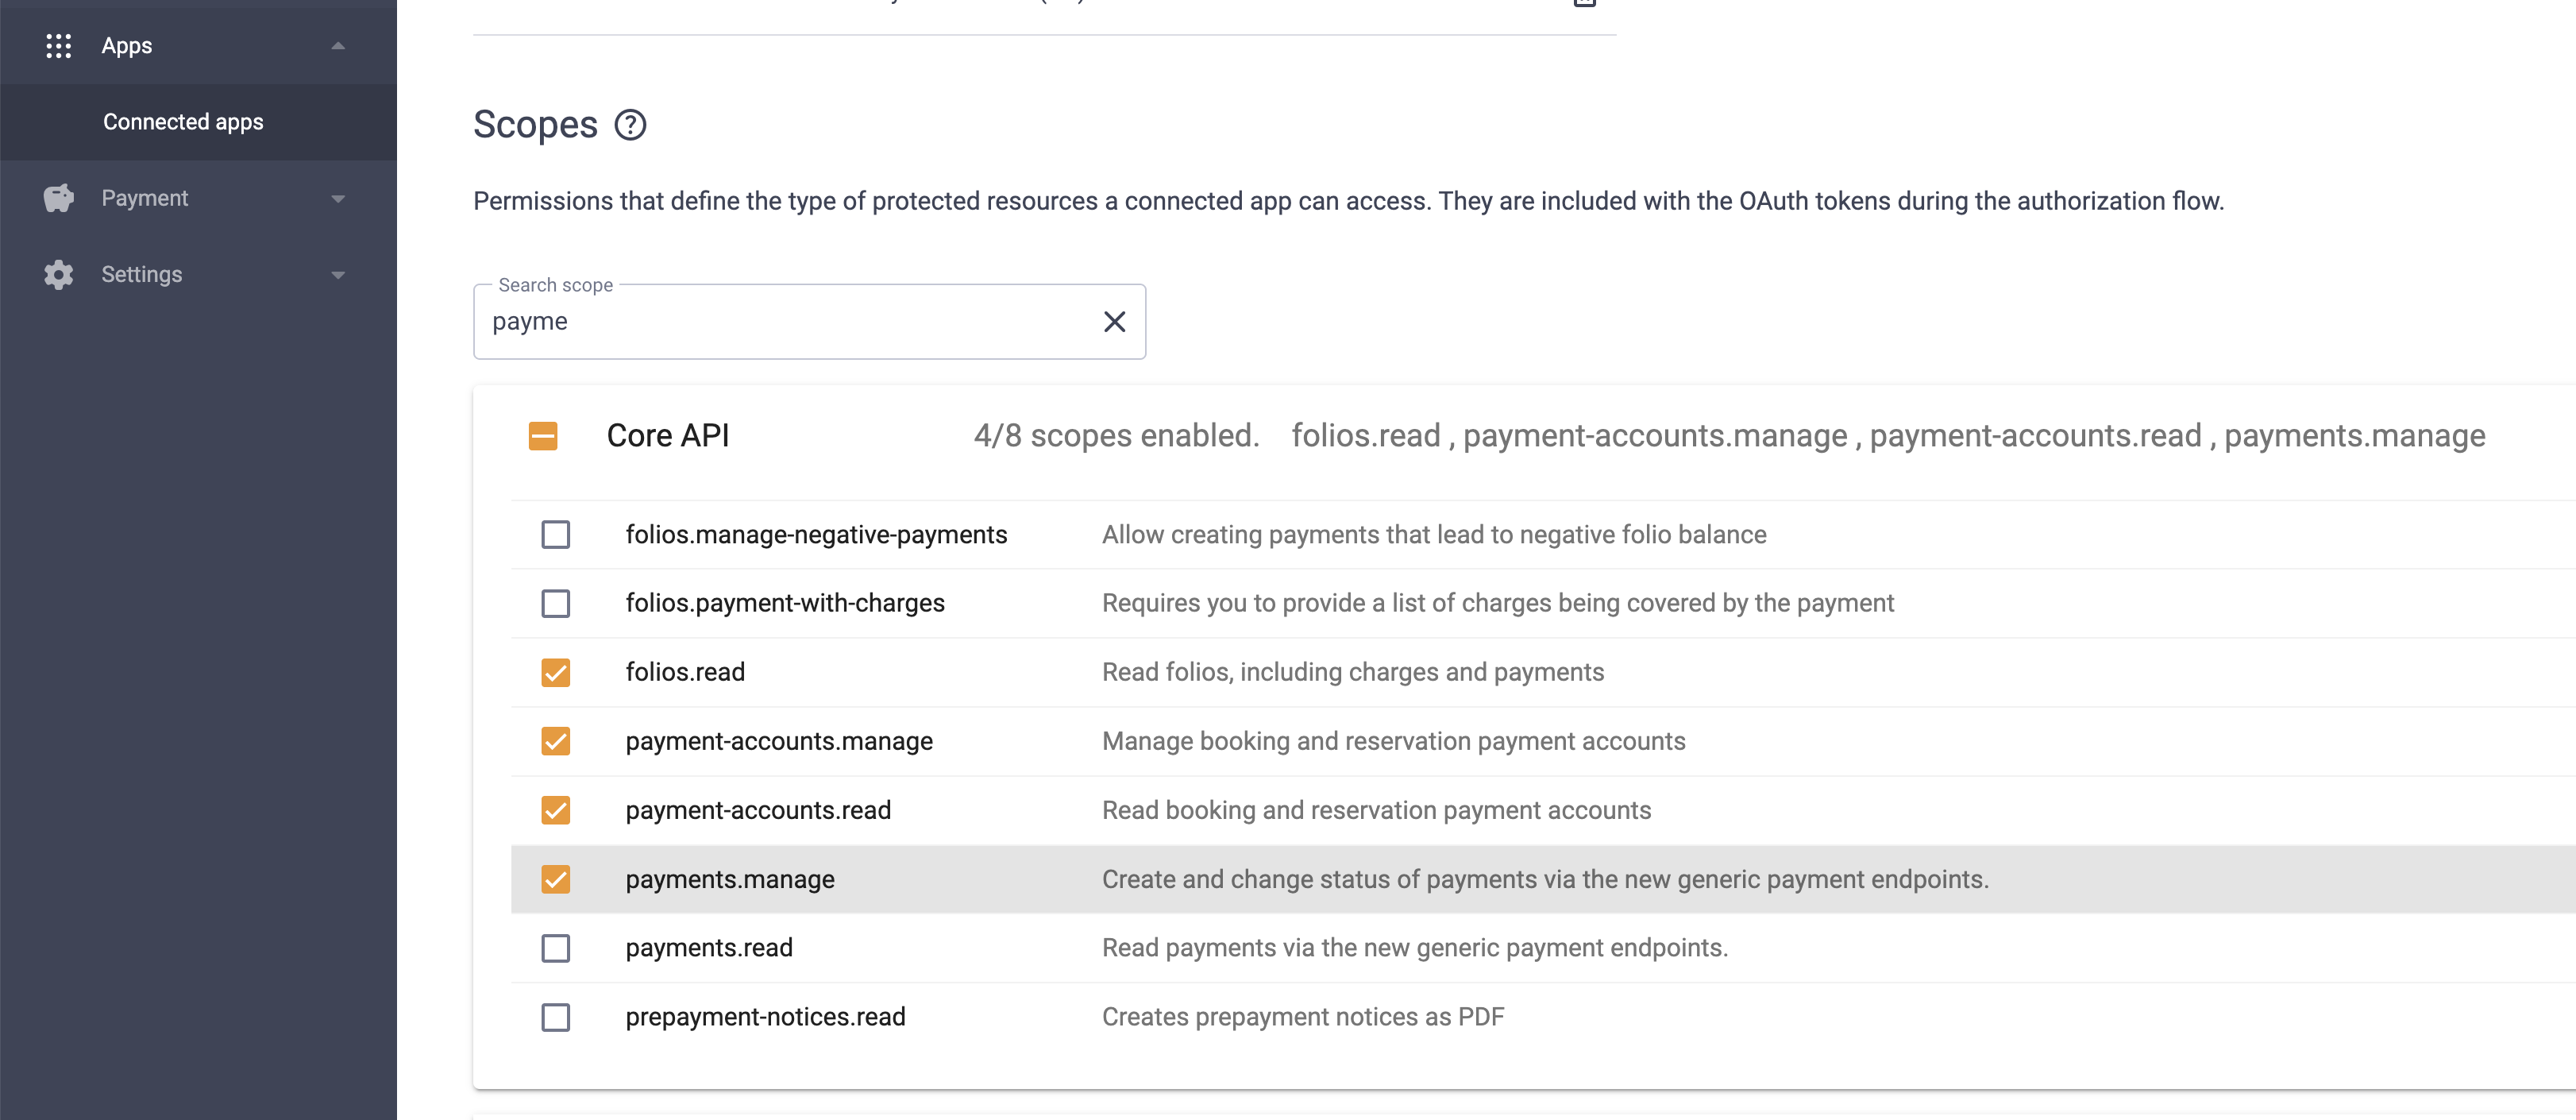
Since this Apaleo community announcement on the deprecation of the paymentAccount and accountOwner fields, these Core API scopes are also required:
- Core API >
payment-accounts.manage - Core API >
payment-accounts.read
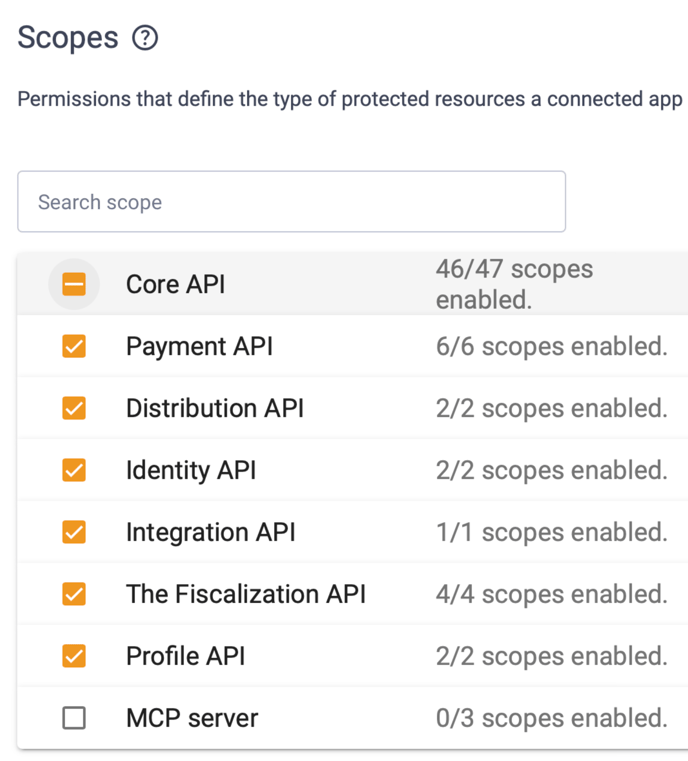
Enable all scopes for the following APIs:
- Payment API
- Distribution API
- Identity API
- Fiscalization API
- Profile API
d) Share the Credentials
- Click Save
- A popup will display the following credentials:
ClientIdClientSecret
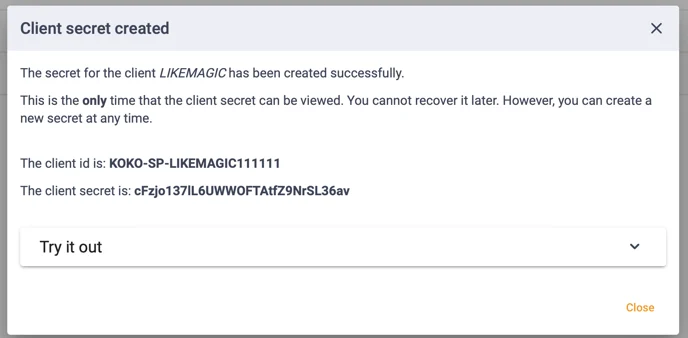
Important: Please do not send these credentials via email. Instead, use a secure one-time link service like onetime.secret.